Can you freeze potato salad

can you freeze potato salad 1

Can You Freeze Potato Salad?

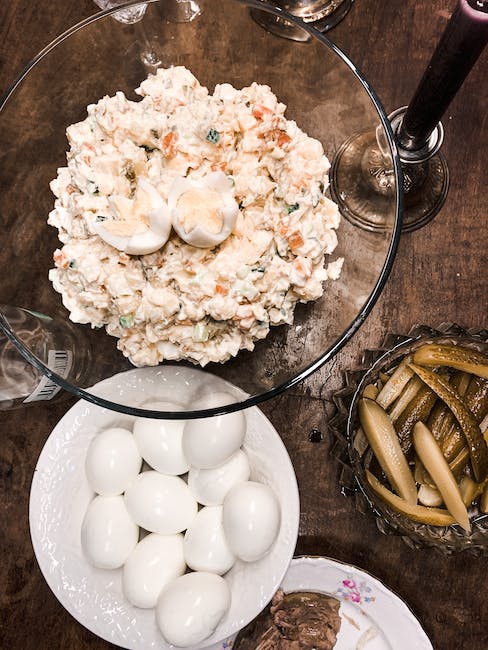
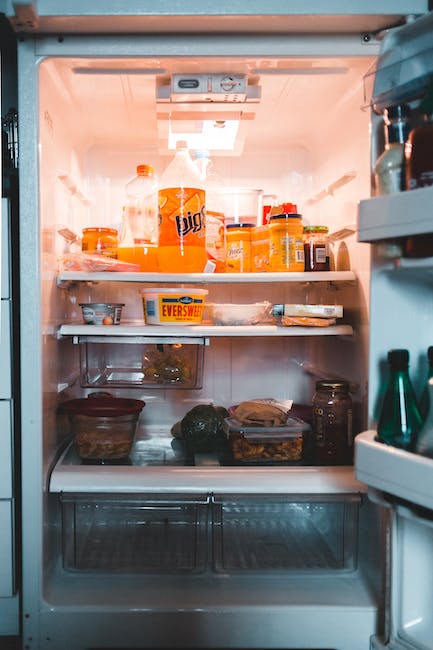
Often when preparing for a meal, you might end up with leftover potato salad, and you wonder, can you freeze potato salad? Well, this post is here to answer all your questions about freezing potato salad. Yes, you can freeze potato salad but there are things to note. The quality of the thawed potato salad might not be the exact same as the fresh. This is because potato salad usually contains dairy-based ingredients, such as mayonnaise or sour cream that might not be freezer friendly.

It’s important to understand that not all potato salads are similar. For example, German potato salad, which generally tends to have vinegar and mustard, is much easier to freeze than a dairy-based potato salad. Mayonnaise based potato salad ends up freezing somewhat grainy rather than creamy when thawed. This is something you should remember when freezing homemade potato salad or even a store bought potato salad.

Preparing for Freezing: What You Need

To preserve your leftover potato salad, there are some crucial things you need. A freezer safe container or freezer bag is what you need to store your salad. When using a freezer bag, ensure to leave at least an inch of space for the salad to expand.

Furthermore, it is crucial to cool the potato salad to room temperature before freezing it. This mitigates bacterial growth, ensuring that your salad can stay for longer. Remember to observe hygiene to reduce chances of bacterial growth on your potato salad.

freezing procedure for potato salad

Freezing Procedure for Potato Salad

Once you have your salad at room temperature, it’s time to put it in the airtight freezer. You need not worry if your salad has sour cream as your main dressing. Yes, sour cream might not be very freezer friendly compared to vinegar or mustard, but it will still hold up just fine.

Again, ensure that you do not fill your storage bag to the brim. Leaving an inch of space is a good practice as it provides room for the salad to expand upon freezing. If you skip this step, your freezer bag might burst open, making a mess in your freezer.

unfreezing your potato side

Unfreezing Your Potato Side

When the time comes and you need to use your frozen potato salad, all you have to do is remove it from the freezer and let it thaw. Thawing allows the salad to regain some of the lost moisture due to freezing.

You’d have to incorporate a few tweaks for your salad to regain its initial salad taste. For instance, the sour cream might taste bland, or the mayonnaise might have a grainy texture. In such cases, just add a fresh coat of your preferred dressing.

impact of freezing potato salad

Impact of Freezing Potato Salad

Freezing potato salad is undoubtedly a great way to store it. But as mentioned earlier, the thawed potato salad might not maintain the initial fresh taste. Remember, freezing is only meant to help in food preservation and not necessarily to enhance the taste.

Therefore, only freeze potato salad if you’re okay with making a few alterations when it’s time to eat it. Such alterations may include adding additional dressings or spices to revive the initial taste.

enhancing the taste after freezing

Enhancing the Taste After Freezing

If your thawed potato salad has lost flavor, you need to do some touch-ups to regain it. Adding fresh dressings such as mayonnaise or sour cream could help make it taste better. If your potato salad had onion slices, you could also add fresh slices since frozen onions usually lose their flavor.

The addition of fresh herbs and other flavorful ingredients can further increase the deliciousness of your salad. Remember, you want it to taste as close as possible to the fresh salad. This way, you’re sure to enjoy your favorite side dishes as much as possible.

storing potato salad with non dairy dressing

Storing Potato Salad With Non-dairy Dressing

If you prefer a non-dairy based potato salad, such as the German potato salad, freezing is much easier. These kinds of salads are more freezer safe, and you won’t have to worry about your salad developing a strange texture upon thawing.
Unlike the dairy-based salad, you will not have to worry about rejuvenating a german potato salad. However, you might want to reheat it before eating to enjoy it more.

faqs about freezing potato salad

FAQs About Freezing Potato Salad

What happens to store bought potato salad when frozen?

Freezing store bought potato salads might alter their texture and taste. However, adding fresh dressing when you’re about to eat it might help regain the initial taste.

How do I maintain the quality of leftover potato salad while freezing?

First, make sure to cool it down to room temperature before you freeze it. Also, store it in a freezer safe bag or airtight freezer to maintain maximum freshness.

Is it safe to eat thawed potato salad?

Yes, it’s safe as long as you thaw it properly. However, it might not taste like a fresh salad.

Why should I leave an inch of space when freezing potato salad?

The space allows the salad to expand when frozen. If there’s no space, your storage bag might burst open in the freezer.

Can you freeze a mayonnaise based potato salad?

Yes. However, it might develop a slightly grainy texture when thawed, due to mayonnaise not being very freezer friendly.

How to revive the taste of frozen potato salad?

Adding a fresh layer of dressings, herbs, and spices might help revive the taste.

Does freezing kill bacterial growth in potato salad?

While it doesn’t kill the bacteria, freezing slows down the bacteria’s growth rate, ensuring longer preservation.

Which potato salad is best for freezing?

German potato salad is easier to freeze than dairy-based potato salads. This is because it usually has mustard and vinegar rather than mayonnaise.

Can I refreeze potato salad?

No, once the salad has thawed, it’s not recommended to refreeze it as refreezing increases the risks of bacterial growth.

Why is my frozen potato salad watery?

It might be because of the freezing process. The water in the potato salad separates from other components of the salad, leading to a watery thawed potato salad.

How to cook wagyu steak

understanding the fat content in wagyu beef

Understanding the Fat Content in Wagyu Beef

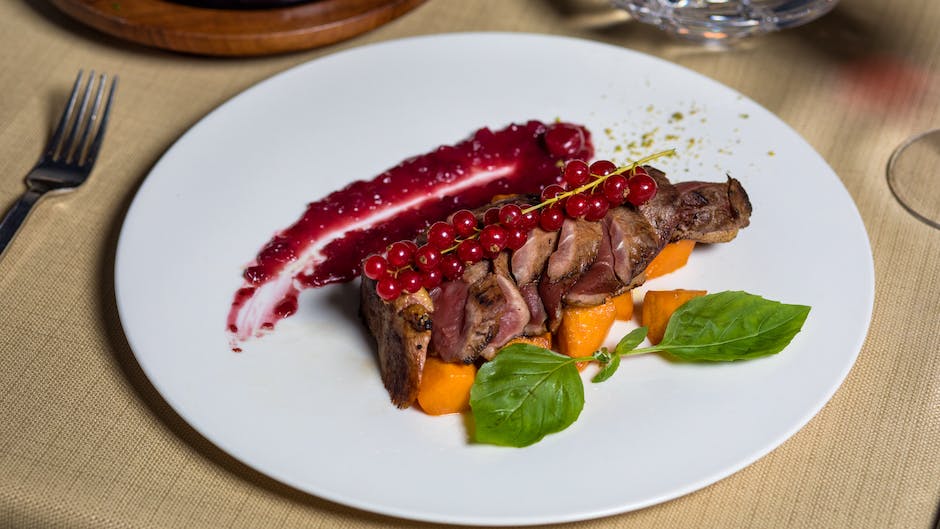
The reason why experts extol the virtues of Wagyu steak lies in its high fat content. This superior cut of meat is lit up by fat marbling not usually found in other steaks. This fattiness is what gives the meat its tender texture and unique taste. Before you cook the steak, take a moment to appreciate the marbling pattern, as it’s the key to the steak’s rich flavor.

Having the steak at room temperature is crucial before you start cooking. Take it out of the refrigerator a few hours before cooking to allow it to reach room temperature. This way, it will cook evenly, ensuring that all parts of the steak are at the desirable finishing point simultaneously.
Choosing the Right Cut: Wagyu Ribeye

When it comes to cooking wagyu beef, the wagyu ribeye is a popular choice due to its high fat content. This ensures a rich flavored steak that melts in your mouth. The marbling in the ribeye provides an amazing texture and flavor that is unique to this type of steak.

Remember that the optimal time to remove the steak from the heating source is a few degrees before it reaches the desired doneness. This is important because the steak will continue cooking on the serving plate, due to residual heat from the internal fat reserves. Timing your cooking is critical to preserving the natural juices and flavor of the wagyu steak.

seasoning the steak salt and pepper

Seasoning the Steak: Salt and Pepper

Essential to any steak is the seasoning. For your American Wagyu steak, keep it simple with good old salt and pepper. The high-fat content of this type of steak allows for the natural flavor of the beef to shine through, so you do not need any fancy herbs or spices.
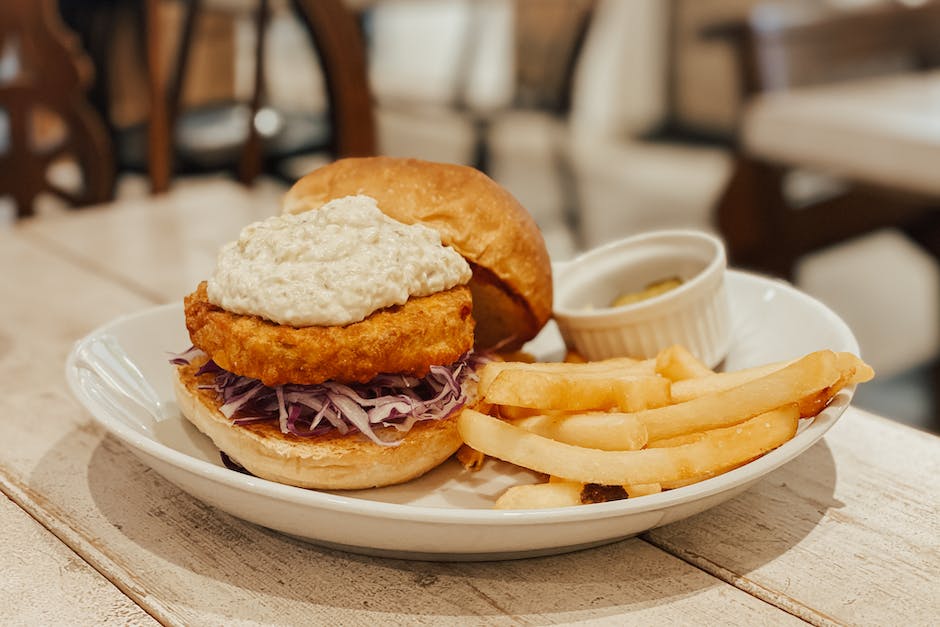
The beauty of wagyu is that it comes packed with natural flavors, meaning you don’t need much in terms of additional steak seasoning. Its lip-smacking goodness can be effectively brought out by just about two hours before cooking.

the cooking method pan sear

The Cooking Method: Pan Sear

When cooking wagyu beef, one of the best methods is to pan sear it. Heat your cast iron skillet over medium-high heat and sear the steak, giving it a beautiful, flavorful crust. This method allows the steak to cook in its own fat, adding to the meal’s delicious outcome.

Aim to cook your steak medium rare. This is often regarded as the perfect level of doneness for a steak, especially wagyu. When cooked to medium rare, the steak is warm and has a firm yet yielding texture, offering a full-mouth feel that’s neither too firm nor too soft.

monitoring the cook cooking times and meat thermometer

Monitoring the Cook: Cooking Times and Meat Thermometer

Pay close attention while cooking wagyu beef. Cooking times vary based on the size and thickness of the steak. As a rule of thumb, it’s typically around three to four minutes per side for medium rare.

Never guess the temperature of a steak; instead, always check the internal temperature with a meat thermometer. This eliminates guesswork and ensures accurate results. The perfect temperature for a medium-rare wagyu steak is between 130°F and 135°F.

bringing out the flavor high heat and cast iron pan

Bringing Out the Flavor: High Heat and Cast Iron Pan

Always cook wagyu steak on high heat to give it a beautiful sear. The high heat also helps to melt the fat and hence fend off stickiness. For the best results, use a cast iron pan. These types of pans are known for their heat retention and even heating properties.

However, never leave your steak unattended. The high fat content makes it prone to flare-ups. Even on high heat, flip your steak every minute to distribute the heat evenly and produce a perfect crust while preserving the steak’s natural flavor.

faq on how to cook wagyu steak

FAQ on How to Cook Wagyu Steak

How important is the fat content in Wagyu beef?

The fat content, specifically the marbling, is crucial in Wagyu beef as it contributes significantly to the steak’s unique flavor and texture.

Why should the steak be at room temperature before cooking?

Keeping the steak at room temperature before cooking ensures that it cooks evenly. The heat distributes evenly through the meat for a perfectly cooked steak.

Why do we use a cast iron skillet to cook wagyu steak?

A cast iron skillet has excellent heat retention and distributes heat evenly, crucial for searing the steak well and cooking it evenly.

What’s the ideal internal temperature for a medium rare wagyu steak?

The perfect temperature for a medium-rare wagyu steak is between 130°F and 135°F.

Do I have to season my wagyu steak?

Yes! Seasoning brings out the natural flavors of the steak. But with wagyu, keep it simple with just salt and pepper.

Why should you salt your steak hours before cooking it?

Salting your steak hours before cooking allows the salt to penetrate into the steak, amplifying its natural flavor.

How long to pan sear wagyu steak?

It will typically take around three to four minutes per side for medium rare.

What should I do if my steak is getting burnt while on high heat?

Never leave your steak unattended, especially while cooking on high heat. In the event of flare-ups, flip the steak every minute.

Should I use any steak seasoning for wagyu steak?

The natural flavors of wagyu are so rich that you only need minimal seasoning. A dash of salt and pepper is enough to enhance its flavor.
Why is my wagyu steak tough?

Undercooking or overcooking a wagyu steak can make it tough. Remember to heat your steak to the right internal temperature and let it rest before serving.

How to make burger patties from ground beef good cook

making burgers the basics

Making Burgers: The Basics

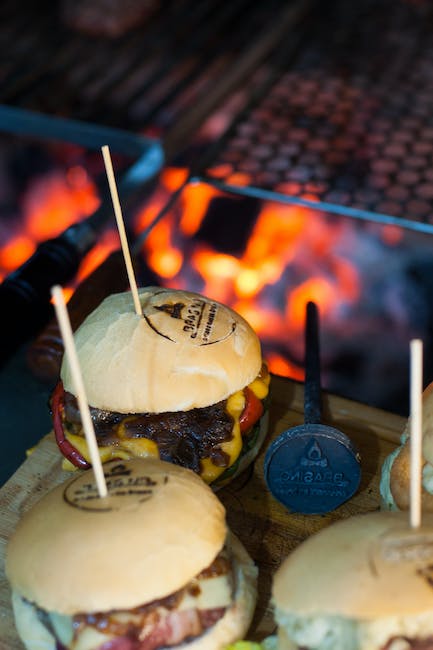
Making burgers is one of the most cherished culinary arts. The burger patties are the heart and soul of any good hamburger. Starting with the right kind of beef is a priority. Usually, chefs prefer using ground chuck for a juicy and flavorful burger. Ground chuck has the perfect fat content to make well-textured, mouth-watering patties.

Ground chuck offers a blend of richness and depth to your burger patties. It usually contains 15-20% of fat, providing the perfect balance ensuring the patty remains moist during cooking. Let’s remember: the juicier the patty, the tastier your burger will be!

Heating Direction: Medium High Heat

Figuring out the right heat setting can be confusing. However, when making burger patties out of ground beef, medium high heat is the ideal temperature. The heat level ensures burgers cooked evenly, resulting in a mouthful of scrumptious bites every time.

Adjusting your cooking temperature will undeniably play a crucial role in the burger’s final taste. Placing the patties on medium high heat encourages even cooking while maintaining a tastefully charred exterior and juicy interior. These factors combined contribute to a fantastic homemade burger!

adding flavor salt and pepper

Adding Flavor: Salt and Pepper

A pinch of salt and pepper goes a long way when it comes to seasoning your patties. The seasoning will enhance the natural flavor of your ground chuck, elevating your homemade burger to a whole new level.

Salt and pepper should ideally be added right before you cook the patties. If these seasonings sit too long on the raw meat, it can start to change the texture of your burgers. So remember, for a perfect burger, season just before it hits the pan or grill.

playing with toppings favorite toppings

Playing with Toppings: Favorite Toppings

Burgers aren’t complete without some favorite toppings. This can range from lettuce, tomatoes, pickles, and onions to cheeses, bacon strips, and different kinds of sauces. It’s the chance to customize and make the burger recipes your own.

Whichever toppings you choose, remember, it’s crucial to strike a balance. You don’t want toppings overwhelming the flavor of the patty. This stage isn’t just about variety but harmony and balance to bring out the best in your burger.

baking complements sheet pan

Baking Complements: Sheet Pan

Using a sheet pan comes handy for both cooking your burger patties and preparing side accompaniments like crispy French fries. This versatile kitchen tool ensures evenly cooked meals and ease of clean-up.

The sheet pan can also double up as a prepping station for your burgers. You can shape your burger patties, arrange your buns, and line up your favorite toppings on the pan. This will make the cooking process more efficient and less chaotic.

preparing the buns hamburger buns

Preparing the Buns: Hamburger Buns

A great burger isn’t just about the patty. The buns matter too. Choose fluffy, slightly sweet hamburger buns that will complement your delicious homemade patties. A lightly toasted bun can make a world of difference to your overall hamburger experience.

Before serving, whizz your buns on the grill or toast them lightly in the oven. A slight char adds a hint of crunch and keeps the bun from getting soggy from the burger juices or sauce. Opt for quality hamburger buns for a premium burger experience.

ensuring well cooked meat cooking times amp meat thermometer

Ensuring Well-cooked Meat: Cooking Times & Meat Thermometer

Understanding cooking times and knowing how to use a meat thermometer guarantees a safe and well-cooked burger. Achieving the right internal temperature is crucial to avoid undercooked or overcooked patties.

A meat thermometer is a reliable tool to check the internal temperature. For beef patties, the USDA recommends an internal temperature of 160 degrees Fahrenheit for safety. Keeping an eye on cooking times and temperatures will ensure a perfectly cooked burger every time.

mastering the pan cast iron skillet

Mastering the Pan: Cast Iron Skillet

A cast iron skillet is an excellent tool for making burger patties out of ground beef. It provides consistent heat for even cooking, and it gives the patty a delicious crust that’s hard to achieve on a grill.

Moreover, the cast iron skillet is endlessly versatile. You can use it to sauté onions and mushrooms, melt cheese on top of your patties, or even toast your hamburger buns. It’s a reliable ally for any good cook aiming to create a perfect burger.

proceeding with perfection homemade burger and perfect burger recipes

Proceeding with Perfection: Homemade Burger and Perfect Burger Recipes

By now, you realize it’s not overly complicated to master how to make burger patties from ground beef, providing you’re a good cook. With this comprehensive guide, you can replicate your favorite hamburger recipes and even experiment with your own unique flavors.

Creating the perfect burger at home is about understanding ingredients, mastering techniques, and adding your unique twist. While practice makes perfect, you can start impressing your friends or loved ones with your burger making skills from now itself!

FAQ

What’s the best ground beef to use for burgers?

The ideal choice is ground chuck due to its perfect fat content.

What temperature should I cook my burgers on?

Medium high heat is perfect for cooking burgers.

When should I season my burger patties?

Seasoning with salt and pepper should be done right before cooking.

What kind of toppings can I put on my burger?

There’s a wide range to select from, including lettuce, tomatoes, pickles, onions, cheeses, bacon strips, and various sauces.

Can I use a sheet pan to cook my burgers?

Yes, a sheet pan is excellent for cooking burgers and side dishes like French fries.

What kind of buns should I use for my burger?

Fluffy, slightly sweet hamburger buns complement the burger patties well.

How long should I cook my burgers?

The cooking time varies, but using a meat thermometer helps ensure a safe internal temperature of 160 degrees Fahrenheit.

Is a cast iron skillet good for burgers?

Yes, a cast iron skillet offers even cooking and can create a delicious crust on the patty.

How can I make the perfect homemade burger?

Understanding your ingredients and mastering the techniques shown in this guide will help you achieve perfection.

Can I make my own burger recipes?

Absolutely! Feel free to experiment and add your unique twist to your burgers.

How many cups is 24 oz

transforming units convert 24 oz to cups

Transforming Units: Convert 24 oz to Cups

Converting 24 oz to cups is a straightforward process. It’s a crucial step whenever you’re faced with the task to measure ingredients. This conversion is valuable for both wet and dry ingredients and ensures accuracy when following an elaborate recipe. At a glance, 24 fluid ounces (fl oz) is equivalent to three cups. The conversion is often vital for bakers or chefs who need precision in combining their ingredients, as a single mistake can throw off the balance of flavors.

For those wondering how our calculation came about, it’s easy to understand if you know that one ounce is equal to 0.125 (or 1/8) cups. Now, to determine how many cups is 24 oz, simply multiply 24 by 0.125 –– thus bringing about the result, three cups. It’s a basic multiplication operation that you can execute accurately every time.

Grasping Fluid Measurements: 24 Fluid Ounces to Cups

Understanding how the conversion of 24 fluid ounces to cups works is pivotal in the food industry, particularly in baking and cooking where precision is a must. Whether you’re required to measure out a cup of water for a recipe or need to compute the exact amount of chocolate chips needed to sweeten your cookie dough, the ability to convert fluid ounces to cups effectively is vital.

The process of converting 24 fl oz to cups isn’t a complex one. With the knowledge that one fluid ounce is equal to 0.125 (or 1/8th) of a cup in the standard American system of measurement, you can accurately determine that 24 ounces to cups is equivalent to three cups. It’s a simple unit of measurement operation that’s applicable to both liquid and dry ingredients.

accurate quantification measure ingredients with precision

Accurate Quantification: Measure Ingredients with Precision

Many individuals frequently question how many cups is 24 oz. This need to convert fluid ounces to cups stems from the necessity to accurately measure ingredients, especially in the culinary world. Whether you’re a professional chef or a homemaker, knowing accurate measurements can significantly elevate your cooking and baking endeavors.

Enlisting the conversion of units enables you to seamlessly turn oz to cups. This is particularly helpful when measuring liquids such as oil or water, leading to precision and consistency in your recipes. It ensures accuracy in your process, which is vital when you’re tasked to translate a written recipe into a delectable dish.

deciphering chocolate metrics how many cups are in 24 ounces of chocolate chips

Deciphering Chocolate Metrics: How Many Cups Are in 24 Ounces of Chocolate Chips?

For the sweet-tooth victims among us, one of the most frequent converting 24 ounces computations we encounter is about chocolate chips. So, if the packaging sold to you is measured in ounces, how many cups is 24 oz of chocolate chips? Once again, the magical number is three—three cups of sweet, melting morsels ready to transform your baked goods into chocolaty wonders.

Chocolate chips, like all other baking ingredients, require accurate measurement, particularly when dry ingredients like flour and sugar enter the picture. Measuring 24 oz of chocolate chips with a cup ensures accuracy, giving you the right amount of sweetness each time.

establishing the connection link between fluid ounces and cups

Establishing the Connection: Link Between Fluid Ounces and Cups

By now, consistently using the unit of measurement conversion between ounces and cups, you have probably already begun to understand how simple mathematics enables the easy quantification of your baking and cooking entities. Whether you’re faced with measuring liquids or handling dry ingredients, the conversion from ounces to cups facilitates a seamless process.

So when in doubt, remember, three cups exist within 24 oz. This conversion is your best bet when you need to regenerate fluid ounces, solids, or semi-solids into cups. It’s a handy tool that guarantees the accuracy you seek while cooking, baking, or experimenting in your kitchen.

in conclusion

In Conclusion

The question of “how many cups is 24 oz” is one that yields a straightforward answer: three. This conversion applies to both fluid ounces and solid measures, bringing an assurance of accuracy to your culinary endeavors. Whether you’re tasked with portioning a cup of water or measuring out delicate chocolate chips, remember that 24 ounces is equal to three cups, granting stability to your recipes.

frequently asked questions

Frequently Asked Questions

How many cups is 24 fluid ounces?

24 ounces is equivalent to 3 cups.

Can I convert 24 oz to other units of measurement?

Yes, you can convert 24 oz to other units of measure, like pints or quarts.

Is the conversion from oz to cups the same for dry and liquid ingredients?

Yes, the conversion rate remains the same for both dry and liquid ingredients.

How can I ensure accuracy in measurement when converting ounces to cups?

By applying the conversion standard that 1 oz equals 0.125 (1/8th) of a cup, you can ensure accuracy in measurement.

What is the conversion rate between fl oz and cups?

One fluid ounce (fl oz) is equal to 0.125 or 1/8th of a cup.

How many cups are in 24 ounces of dry ingredients like flour or sugar?

24 ounces of dry ingredients like flour or sugar is equal to 3 cups.

Can I use the same method to convert 24 ounces of chocolate chips to cups?

Yes, the same conversion applies. 24 ounces of chocolate chips equates to 3 cups.

What should I do if a recipe uses ounces but all I have is a cup?

If a recipe lists ingredients in ounces, and all you have is a cup, simply remember that one ounce is equal to 0.125 (or 1/8) cups.

Is the conversion of ounces to cups the same in all countries?

No, the conversion may differ depending on national standards. This blog specifically refers to US standards.

At the end, how many cups is 24 oz?

24 ounces equals 3 cups, whether it’s liquid or dry measurement.

What chocolate for a chocolate fountain

room temperature makes a difference

Room Temperature Makes a Difference

Operating a chocolate fountain requires some basic understanding of temperature dynamics. Room temperature plays a crucial role in determining the thickness and flow of the chocolate. In regions that are naturally cold, you might need to pre-heat your chocolate to a slightly higher degree than recommended. On the contrary, in warmer regions, sticking to manufacturers’ recommended heating temperatures is advisable to ensure the chocolate is flowing smoothly.

Additionally, it’s a pro tip to keep your chocolate at room temperature before you start the melting process. This allows the chocolate to heat up evenly and prevents the formation of any unwanted lumps.

Clean Your Chocolate Fountain for Optimal Performance

As with any kitchen appliance, knowing how to clean a chocolate fountain can significantly enhance its performance and lifespan. Doing this not only keeps the appliance hygienic but also ensures the chocolate flows smoothly every time. You can start by disassembling the parts, then using warm, soapy water to gently scrub each piece. Rinse them under running cups of water and dry thoroughly before reassembling.

Operating a clean chocolate fountain ensures that there’s no previous residue that could potentially affect the taste and quality of the fresh batch. For effective cleaning, consider using non-abrasive sponges for scrubbing. Microfiber or lint-free towels can then be used for drying the parts, ensuring no water spots are left behind.

choose the right kind of chocolate

Choose the Right Kind of Chocolate

When pondering over what chocolate for a chocolate fountain is the best, the type of chocolate you want can highly depend on personal preference. Some might favor milk chocolate for its creamy and smooth taste, while others might prefer dark chocolate because of its intense cocoa flavor.

Nevertheless, whatever your choice may be, it’s always recommended to use high quality chocolate with a high percentage of cocoa butter (anywhere from 32 – 37%). This makes it melt easily and gives it a shiny finish, ensuring it cascades perfectly down the tiers for a satisfying, tempting display.

use high quality chocolate

Use High-quality Chocolate

The quality of the chocolate does make a considerable difference in how well your chocolate pours from the fountain. High quality chocolate contains higher amounts of cocoa butter, making it smoother and more liquid when melted. This improves the flow in the chocolate.

On the other hand, mediocre quality chocolate might contain vegetable oils as substitutes. While they might be cheaper, they lack the rich, creamy texture and taste that real chocolate offers. When it comes to choosing chocolate for a chocolate fountain, it’s best not to skimp on quality for the best results.

white chocolate a luxe alternative

White Chocolate: A Luxe Alternative

For those looking for a fancier option, white chocolate makes for an elegant choice. Enriched with cocoa butter, milk chocolate, and sugar, it offers a richer, creamier and sweeter taste compared to its dark and semi-sweet counterparts.

Despite being different in terms of color, the melting process is quite similar. However, because white chocolate is more delicate, it’s best to melt it using the double boiler method or the instant pot method to avoid overheating and potential burning.

set up your chocolate fountain correctly

Set Up Your Chocolate Fountain Correctly

As elementary as it may sound, knowing how to set up your chocolate fountain can be instrumental in determining the success of your chocolate cascade. Begin by assembling the fountain parts, ensuring they’re correctly and securely installed. Once done, preheat the fountain as per the manual, and pour the melted chocolate.

The pre-heat duration might vary based on the model, however, a good quality machine should not take more than 5 minutes to be ready. Ensure it sits on a sturdy, flat surface, so there’s no risk of it toppling over. Moreover, make sure not to exceed the maximum capacity of your machine to prevent overflow.

mix in a little flavor

Mix in a Little Flavor

While the classic chocolate fondue fountain is always a hit, sometimes, adding a dash of flavor can up the ante. Depending on the crowd you’re catering to or the event you’re holding, adding extracts like mint, orange, or cherry can jazz up your dessert station.

Perform this step after the chocolate is melted and mixed evenly. Use light hand while adding the extracts – the aim is to enhance and not overwhelm the chocolatey flavor.

the perfect chocolate fountain recipe

The Perfect Chocolate Fountain Recipe

If you’re planning on making chocolate fountain recipe from scratch, the ingredients you’ll need are simple: semi-sweet chocolate chips, heavy cream, and good quality cocoa powder. The quantity of the ingredients can vary depending on the number of guests.

Start by melting the chocolate using either the double boiler or the instant pot method. Stir continuously to keep the mixture smooth. Finally, add in the heavy cream and the cocoa powder, and mix until everything combines well.

selection between dark milk and semi sweet chocolate

Selection Between Dark, Milk, and Semi-sweet Chocolate

Among dark chocolate, milk chocolate, and semi-sweet chocolate, the most popular chocolate for a chocolate fountain tends to be semi-sweet or dark. The slightly bitter taste cuts through the sweetness and offers a balanced flavor. Dark chocolate is rich in cocoa butter, which allows it to melt and flow gracefully throughout the machine.

Milk chocolate is a close second, with many people loving its sweet, creamy taste. Meanwhile, semi-sweet chocolate chips have been the go-to for many as they’re easily available, affordable, and offer a balanced sweet-bitter taste.

FAQ

Should I melt the chocolate before adding it to the fountain?

Yes, melting the chocolate before pouring it into the fountain allows it to flow smoothly.

Is dark chocolate good for chocolate fountains?

Yes, dark chocolate is excellent for chocolate fountains due to its high cocoa butter content.

How long should I heat the instant pot for melting the white chocolate?

It depends on the quantity of the chocolate and the pot’s settings. However, usually, a slow melt setting should do the job in about 6-10 minutes.

I am not sure about how to set up my chocolate fountain. Where can I find this information?

You can refer to the manufacturer’s guide that came with your chocolate fountain.

Why isn’t my chocolate flowing smoothly in the fountain?

The chocolate might not be flowing smoothly due to insufficient heating, lumpy or poorly melted chocolate, or the use of low-quality chocolate.

Can I add water to thin out the chocolate in my chocolate fountain?

While you can technically add water, it can affect the taste, quality, and texture of the chocolate. Using cocoa butter or neutral oil is a better substitute.

How much white chocolate would I need for a medium-sized chocolate fountain?

The amount would largely vary depending on the capacity of your fountain. Typically, 2 to 4 lbs of white chocolate should suffice for a medium-sized chocolate fountain.

Can I add flavor extracts to my chocolate fountain?

Yes, you can add flavor extracts like mint, orange, or almond to your melted chocolate for extra taste.

Should I clean the fountain after every use?

Yes, the best practice is to clean your chocolate fountain thoroughly after each use.

How do I make a chocolate fountain recipe?

Begin by melting your choice of chocolate, add in heavy cream, and cocoa powder. The proportions can be adjusted as per your taste and the number of guests.

How many cups are 8 oz

deciphering recipe calls importance of measurements

Deciphering Recipe Calls – Importance of Measurements

Every culinary enthusiast knows the significance of accurate measurements in recipe calls. The key factor to achieving the desired taste and texture is properly measuring dry ingredients, whether in ounces or cups. Even a small discrepancy can lead to disaster, and it’s not just in baking; even cooking staples like rice or pasta require an uncanny amount of precision. That’s where the ability to understand how to convert ounces to cups comes into play.

For instance, when a recipe asks for 1/2 cups of sugar or salt, you should have a fair idea of the conversion. If you’re left wondering “how many cups are 8 oz,” it could result in a culinary calamity. For liquid measurements, a standard liquid measuring cup would do the trick, but for dry ingredients such as flour, measuring is a whole different ball game.

Simplifying Measurements: Converting 8 Ounces

In the culinary world, converting 8 ounces or any other amount is not as daunting as it may sound. With a thorough understanding of the measurement units used in your country, you can easily decipher any recipe. In the United States, measurements are generally stated in ounces, liters, gallons, cups, tablespoons, and teaspoons.

The fundamental equation to keep in mind is that 8 oz equals 1 cup. It means if you’re converting 8 oz, the number of cups would be only one. However, for a recipe calling for 1/2 cups, it is equivalent to 4 ounces. Grasping this conversion is particularly important when measuring dry ingredients.

understanding units ounces and cups

Understanding Units: Ounces and Cups

When you’re constantly juggling between ounces and cups, having a clear understanding of these units is vital. Remember, we use these measurements for both liquids and dry ingredients, but you must always measure them separately. The standard is 8 fluid ounces for a cup on a liquid measuring cup and the same for measuring dry quantities.

Despite using the same units, the weight can considerably differ. For instance, a cup of sugar will not weigh the same as a cup of flour even though both are dry ingredients. This discrepancy underlines why accurate measurements are necessary, particularly when the recipe calls for specific quantities.

implementing accurate measurements tools and techniques

Implementing Accurate Measurements: Tools and Techniques

When it comes to efficient cooking and baking, accurate measurements go hand in hand. For accurate measurements, use dry measuring cups for dry ingredients such as flour and sugars, and a glass or plastic liquid measuring cup with a pouring spout for liquids. These cups often have scaled markings to allow accurate measurements.

It’s equally important when a recipe calls for tablespoons and teaspoons. Bear in mind that 16 tablespoons are equivalent to 1 cups in terms of volume. This information proves crucial when you need to figure out how many cups are in a larger unit of measurement like ounces or tablespoons.

the magic number 8 oz equals

The Magic Number: 8 oz Equals

As established earlier, the golden rule is that 16 tablespoons are equivalent to 1 cups. If you want to make finer measurements, remember that 8 oz equals 1 cup. It is crucial to keep in mind that these conversions apply to volume measurements. However, they may not bear accuracy if used for weight measurements.

Due to the differences in density of substances, unit conversions for volume may not hold if you try to convert the weight. For the purpose of understanding, 8 oz equals 1 cup only when measuring volume. When following a recipe, make sure you understand if the recipe calls for measurements in ounces (weight) or fluid ounces (volume).

conversions in cooking equals 1 cup

Conversions in Cooking: Equals 1 Cup

Knowing that 8 oz equals 1 cup makes it easier to comprehend measurements when a recipe calls for a certain quantity in cups. Conversely, if the requirement is in ounces, your skills of converting ounces to cups are tested. A deeper understanding of the conversion lets you manage kitchen affairs more confidently.

In culinary measures, finding an equivalent to 1 cups isn’t complicated if you remember the basic formula. Whether the ingredients are solid or liquid, ounces or tablespoons, knowing that 8 oz or 16 tablespoons equals 1 cup will save the day.

expert tips use dry measuring cups

Expert Tips: Use Dry Measuring Cups

For an impeccable cooking experience you need to know how to measure dry ingredients effectively. A regular kitchen scale can help measure solid ingredients by weight, but when it comes to volume, dry measuring cups are your best bet.

Measuring volumes might seem challenging initially, but with regular practice and an innate understanding of “how many cups are 8 oz” or “how many ounces are in a cup,” you’ll perfect your cooking skills. As a seasoned cook, you’ll find your rhythm and breeze through the recipe calls without second-guessing your measurements.

faqs 6

FAQs

How to convert ounces to cups?

Remember, 8 oz is equivalent to 1 cup. Therefore, if your recipe calls for a certain weight in ounces, simply divide it by 8 to convert to cups.

How to measure dry ingredients?

Use dry measuring cups and level off the ingredient with a straight edge knife for accurate measurements.

Is converting 8 ounces to cups the same for dry and liquid ingredients?

While it can still be applied, it’s important to remember that dry and liquid ingredients could vary in weight in an 8-ounce portion.

Are ounces and cups interchangeable in a recipe?

While ounces and cups are forms of measurement, cups measure volume while ounces can measure both weight and volume.

How many tablespoons are in 1/2 cups?

1/2 a cup is equivalent to 8 tablespoons.

How to figure out how many cups are in larger units like pounds or ounces?

If the recipe calls for ounces, divide the number by 8 to get the number of cups.

Is there a difference between dry and liquid measuring cups?

Yes, liquid measuring cups have a spout for pouring and measurements in milliliters, ounces and cups while dry measuring cups are sets of scoops in 1 cup, 1/2 cup, 1/3 cup, and 1/4 cup sizes.

What if the recipe calls for a weight measurement, but I only have volume tools?

Attempt to find a weight to volume conversion online for the specific ingredient.

What is meant by ‘8 oz equals’?

It means that 8 ounces is equivalent to one other form of measurement. In this case, 8 oz equals 1 cup.

Is there a universal equivalent to 1 cup?

In terms of volume, 1 cup is universally understood to be 8 ounces or 16 tablespoons, however, the weight of a cup can vary depending on the ingredient.

What time does bojangles stop serving breakfast

emwhat time does bojangles stop serving breakfastem unearthing the secrets

What Time Does Bojangles Stop Serving Breakfast? Unearthing the Secrets

If you’ve been asking, “What time does Bojangles stop serving breakfast?”, you’re not alone. Bojangles, a popular chicken and biscuits fast food restaurant known for their all-day breakfast menu, has left its customers wondering what time the breakfast muffins and the infamous filet biscuit yield to lunch alternatives. Well, the answer might delight you. Breakfast at Bojangles usually is served till 10:30 a.m. However, certain breakfast items like its gravy biscuit and cheese biscuit are available all day long.

Now, the question “does Bojangles serves breakfast all day” frequently pops up because of the restaurant’s somewhat flexible breakfast hours. Bojangles is famous for its breakfast, but unlike some restaurants which serve breakfast 24 hours, Bojangles breakfast hours mainly focus on the morning rush period. Certain restaurants might have varying cut-off timings though, so it is always advisable to verify from the branch closest to you.

History of Bojangles: More Than Just a Fast Food Restaurant

Founded as a fast food restaurant, Bojangles has a rich history of serving mouth-watering chicken, biscuits, and hearty breakfasts. The moment you step into Bojangles, you become a part of their welcoming atmosphere that complements their palatable dishes. Let it be the cheese biscuit, the fluffy buttermilk biscuit, or the savory fried chicken, Bojangles never disappoints.

Renowned for their impeccable standards and quality service, Bojangles restaurants can be found at numerous locations. With a network of over 750 Bojangles locations spreading across the United States and around the world, it’s not hard to see why this restaurant is a breakfast favorite. If you’re wondering, “What time does Bojangles start serving breakfast?”, most locations promptly begin at 5:00 AM.

a closer look at the bojangles breakfast menu

A Closer Look at the Bojangles Breakfast Menu

The Bojangles Breakfast Menu offers a blend of conventional and innovative options. From steak biscuits, sausage, and egg biscuit sandwiches, to the iconic cajun chicken biscuit, there’s always something for every palate. Tailored to satisfy diverse demands, it caters to both single meal seekers and family needs.

While the regular breakfast is served till 10:30 AM, there’s a select range of items available throughout the day, making Bojangles a favorite spot for breakfast lovers irrespective of the time of the day. In particular, the biscuit sandwiches and gravy biscuit are a must-try if you’re indulging in their breakfast for the first time. With ‘brekkie’ served well into the day, it is no mean feat to say that breakfast is served with regalement at Bojangles.

decoding the bojangles all day breakfast mystery

Decoding the Bojangles All-Day Breakfast Mystery

So “does Bojangles stop serving breakfast at a certain time?” Yes, they do. But a few delectable items from their breakfast menu can be relished throughout the day. Bojangles serves up a variety of biscuits all day long like buttermilk biscuit, cheese biscuit, and gravy biscuit.

This means you have the liberty to enjoy breakfast on your own terms, even if that falls outside conventional breakfast hours. However, be aware that the all-day breakfast availability might vary based on the specific Bojangles locations. So, be sure to check with your local branch the next time you have a breakfast craving past 10:30 AM.

faq section

FAQ Section

Does Bojangles serve breakfast all day?

While Bojangles does not serve its entire breakfast menu all day, certain items like cheese biscuits and gravy biscuits are available throughout the day.

What time does Bojangles start serving breakfast?

Most Bojangles locations begin serving breakfast from as early as 5:00 AM.

What is so special about Bojangles breakfast menu?

Bojangles’ breakfast menu is a delightful assortment of biscuits, gravy, and various biscuit sandwiches, catering to all kinds of taste buds.

What time does Bojangles stop serving breakfast?

Usually, Bojangles stops serving breakfast at 10:30 AM. But, some branches do offer select breakfast items throughout the day.

Can I get a cheese biscuit at Bojangles after 10:30 AM?

Yes, you can. Bojangles offers cheese biscuits all day.

Are gravy biscuit and filet biscuit available all day at Bojangles?

Yes, gravy biscuit and filet biscuit are available all day at most Bojangles restaurants.

What is the most popular item on the Bojangles breakfast menu?

The cajun chicken biscuit is one of the most popular breakfast items at Bojangles.

What’s the secret behind the delicious fried chicken at Bojangles?

Bojangles fried chicken is marinated for 12 hours and then hand-breaded, which makes it incredibly flavorful and juicy.

Which is better: Bojangles buttermilk biscuit or cheese biscuit?

Both have their unique charm! The buttermilk biscuit is creamy and fluffy while the cheese biscuit has a melty cheese flavor. It depends on individual preference.

Does Bojangles serve breakfast sandwiches all day?

No, biscuit sandwiches are part of the morning breakfast menu which is served until 10:30 AM. However, some branches may offer them throughout the day. It’s best to verify from the local restaurant.

How big is a 12 inch pizza

understanding how big is a 12 inch pizza

Understanding “How Big is a 12 Inch Pizza”

How big is a 12 inch pizza? In general terms, a 12-inch pizza is medium-sized, predominantly used as a standard measure for many pizzerias. It’s approximately 12 inches in diameter. Despite its commonplace appearance, the surface area of a 12 inch pizza is approximately 113 square inches. This is important to note as the size directly influences how much a person eats.

However, various factors can alter our understanding of a 12-inch pizza’s size. For instance, thin crust versus thicker crust can vary the actual ‘amount’ of pizza you’re eating, despite the diameter. Additionally, the number of toppings on a pizza changes the density and the weight of the total pizza. Thus, the amount of recommended toppings for a 12 inch pizza is approximately 2 to 3 variety.

Exploring Pizza Sizing: Large Pizzas vs 12-Inch Pizzas

Pizza sizing can easily confuse, with many terms like small, medium, large, and extra-large to classify them. To clarify, large pizzas normally have a diameter of 14 to 16 inches. Thus, a 12-inch pizza falls under medium-sized pizza according to standard pizza sizing.

Your option between a large pizza and a 12-inch pizza may greatly depend on the number of people eating. Usually, more people can eat from a large pizza as compared to a 12-inch one. However, the amount each person eats will vary depending on their appetite and the pizza’s style and toppings.

the role of toppings in 12 inch pizza sizes

The Role of Toppings in 12-Inch Pizza Sizes

When we try to identify how big is a 12 inch pizza, we must consider the toppings. With toppings, a 12-inch pizza becomes denser and potentially more filling. After all, the toppings for a 12 inch pizza is approximately 2 to 3 variety as per common pizzeria recommendations.

Depending on the toppings, the eating experience can vastly change. More toppings could mean a heavier and more filling pizza. However, with less, the pizza may come off as lighter, causing a person to eat more slices. Thus, it is evident that a pizza’s density affects how much a person eats.

thin crust pizza

Thin Crust Pizza

Thin crust pizzas are a popular choice for many pizza lovers. They’re crispy, light, and let the toppings shine. With a thin crust, the surface area of a 12 inch pizza is approximately 113 square inches. But considering the feel and the eating experience, it may seem less compared to a regular or thick crust pizza.

A thin crust 12-inch pizza typically has fewer calories due to less dough used. Therefore, this type of pizza is often recommended for those counting their calorie intake. That being said, people depending on their appetite and personal preferences might end up eating more of thin crust pizza due to its thin base and lighter feel.

preparation and cooking

Preparation and Cooking

Making a 12-inch pizza at home is a fun process that gives you the freedom to craft your favourite style. However, creating the perfect pizza dough for a 12-inch pizza takes some finesse. The dough needs to be evenly spread and must preheat before adding the toppings.

A staple in any pizza recipe, tomato sauce is one of the first toppings added. Spreading tomato sauce over the dough ensures a juicy, flavourful base. The pizza then goes into a preheated oven and cooks until the cheese bubbles and the crust turns golden brown.

in conclusion how big is a 12 inch pizza

In Conclusion: How Big is a 12 Inch Pizza Approximately?

The ultimate understanding or conclusion on how big is a 12 inch pizza is approximately will depend on several parameters. While measuring about 12 inches in diameter with a surface area of 113 square inches, the crust style and the toppings can greatly affect the perceived amount.

Considering everything, for most people, a 12-inch pizza will probably feed 2 to 3 people depending on their appetite and what’s on the pizza. Regardless of these variances, one thing’s for sure: a 12-inch pizza always promises deliciousness in every bite.

frequently asked questions 9

Frequently Asked Questions

1. How many slices are typically in a 12 inch pizza?

Generally, a 12-inch pizza is cut into 8 slices of pizza.

2. Can one person eat a 12-inch pizza approximately?

Yes, one person can eat a 12 inch pizza, but typically it is enough for 2 to 3 people.

3. How big is a 12 inch pizza compared to large pizzas?

Compared to large pizzas, which typically measure between 14 to 16 inches in diameter, a 12-inch pizza is smaller.

4. Does the type of crust change how big a 12-inch pizza seems?

Yes, a thin crust 12-inch pizza may feel smaller compared to the regular or thick crust pizza, due to its lighter texture.

5. How many toppings for a 12-inch pizza is approximately recommended?

The recommended number of toppings for a 12 inch pizza is approximately 2 to 3 varieties.

6. How is the pizza dough for a 12-inch pizza prepared?

The pizza dough for a 12-inch pizza is rolled out evenly into a circular shape of approximately 12 inches in diameter.

7. How much tomato sauce goes on a 12-inch pizza?

The amount of tomato sauce to be used can vary depending on personal preference. Generally, about 2 to 3 tablespoons of tomato sauce are spread on a 12-inch pizza.

8. How many people can eat from a 12-inch pizza?

Usually, a 12-inch pizza could be enough for 2 to 3 people depending on their appetite and the pizza’s style and toppings.

9. How many calories are in a 12-inch pizza?

The calorie content of a 12-inch pizza can vary depending on the type of crust and toppings used. On average, a thin-crust 12-inch pizza might contain between 1000 to 1200 calories.

10. How much time does a 12-inch pizza take to cook in a preheated oven?

A 12-inch pizza typically takes about 12 to 15 minutes to cook in a preheated oven at about 475 degrees Fahrenheit.

What is 35mm in inches

what is the metric system

What is the Metric System?

The metric system is a system of measurement recognized globally. It is decimal-based and contains units like the meter, gram, and liter. Consequently, the unit of measurement millimeter (mm) also belongs to this system. It was built for international usage and precision.

In contrast, the United States, among a few other countries, uses another system of measurement that includes units such as inches, pounds, and gallons. This can sometimes lead to confusion when trying to understand measurements in a different system. For instance, you might not immediately know how to convert 35mm to inches.

The Millimeter to Inches Conversion

Converting millimeters to inches, or convert 35 mm to inches can seem confusing, but once you understand the basics, it becomes straightforward. First, it’s important to clarify what these standard units mean. A millimeter (mm) is a unit of length in the metric system.

The inch, on the other hand, is a common unit of measurement in the United States. So naturally, the question arises, “what is 35mm in inches?”

the simple conversion 35mm is equal to

The Simple Conversion: 35mm is Equal to

So what is 35mm in inches? To answer this, you need to understand how these units relate. Approximately 1.378 inches is the answer to this question. In other words, 35mm is equal to approximately 1.378 inches.

Being aware of this conversion can help in situations where you may be dealing with both systems of measurement. For instant precision, it’s beneficial to know that 35 mm to inches equals 1.378 inches.

the relevance of 35 millimeters

The Relevance of 35 Millimeters

In the world of photography, 35 millimeters is a significant number. It’s the standard film format for analog cameras, commonly referred to as 35mm film.

Everything from standard photo prints to large billboards has been produced using 35mm film. When you see the quality and detail of these images, you begin to appreciate the impact of this film.

precision matters approximately 1378 inches

Precision Matters: Approximately 1.378 Inches

Why is it necessary to know the exact figure? Details matter much in fields such as engineering, architecture, photography, and other science and industry fields. In these practice areas, 35mm measured precision equals approximately 1.378 inches.

Knowing the exact decimal conversion is paramount because even a little miscalculation could result in inaccuracies in project plans or the finished product.

measurement systems guide equal to 1378 inches

Measurement Systems Guide: Equal to 1.378 Inches

Knowing that 35 mm to inches is equal to 1.378 inches may not seem a big deal on the surface. However, this knowledge can come in handy, especially when using both systems of measurement often. It improves your flexibility and adaptability in a world that uses more than one measurement system.

You take one step closer to becoming adept at transferring units from one system to another, crucial in an increasingly globalized world.

bringing it home conclusion what is 35mm

Bringing it Home: Conclusion What is 35mm

So, the conclusion what is 35mm in inches? It’s equal to approximately 1.378 inches. You would be surprised how often this comes up when dealing with international standards, especially for products manufactured outside the United States.

This nugget of information can help increase your efficiency and make your life easier across various platforms and applications.

double check for accuracy

Double Check for Accuracy

It’s always a good idea to double check your conversions. If you’re calculating a measurement in millimeters to inches or vice versa, checking once more could save you from making a costly mistake.

Always remember, accuracy is not only important but also essential when dealing with measurements. Accuracy helps to maintain standardization across different fields and regions.

FAQ

Q1: What is 35mm in inches?

A1: 35mm is approximately equal to 1.378 inches.

Q2: Which unit of measurement does millimeter belong to?

A2: Millimeter belongs to the metric system of measurement.

Q3: How to convert 35mm to inches?

A3: To convert 35mm to inches, you use the standard conversion factor. 35mm equals approximately 1.378 inches.

Q4: Is the metric system used in the United States?

A4: The United States chiefly uses the U.S. customary units, which include inches, but the metric system is also accepted.

Q5: How is 35 millimeters significant in photography?

A5: 35 millimeters is the standard film format for analog cameras, commonly called 35mm film.

Q6: Why should I double check measurements?

A6: Double-checking measurements ensures accuracy and avoids costly errors in calculations.

Q7: What is approximately 1.378 inches in the metric system?

A7: Approximately 1.378 inches in the metric system is equal to 35 millimeters.

Q8: Which systems of measurement are commonly used?

A8: The metric system and the U.S. customary units are the two systems of measurement most commonly used.

Q9: Where is the inch used as a standard unit of measurement?

A9: The inch is a common unit of measurement in the United States.

Q10: How to convert 35 mm to inches?

A10: You can convert 35mm to inches by knowing the conversion factor. 35mm equals approximately 1.378 inches.

Does mountain dew have caffeine

unveiling the caffeine content in mountain dew

Unveiling The Caffeine Content in Mountain Dew

So, does Mountain Dew have caffeine? If you’re a fan of this popular drink, you have likely asked yourself this question a time or two. Rest assured, Mountain Dew, also known as Mtn Dew, is indeed embedded with caffeine.
Just like many other energy drinks and sodas, Mountain Dew incorporates a particular sum of caffeine into its recipe. Keep reading to learn more about your caffeine intake when you sip on Mountain Dew.

How Much Caffeine is in a 12 oz Serving?

Mountain Dew’s standard 12 oz serving typically has around 54 milligrams of caffeine. To give you an idea of how this stacks up, it’s more than a 12 oz can of Coca Cola which contains around 34 milligrams. However, it is less than a cup of coffee, which can range from 95 to 200 milligrams of caffeine, depending on how it is brewed.

does mtn dew have more caffeine than other drinks

Does Mtn Dew Have More Caffeine Than Other Drinks?

The question, does Dew have more caffeine ultimately depends on what you’re comparing it to. Against soft drinks like Coca-Cola, yes, Mountain Dew typically has a higher caffeine content. However, if you compare it to energy drinks or coffee, Mtn Dew has significantly less caffeine. Therefore, your caffeine intake will entirely depend on your beverage choice.

is there a caffeine free version

Is There a Caffeine Free Version?

Debating over whether Mountain Dew has a caffeine free version? Well, the answer is yes! If you love the citrus flavored beverage but want to limit your caffeine consumption, there is indeed a caffeine-free Mountain Dew. This might come as a surprise but it’s an excellent alternative to Mountain Dew for those who are sensitive to caffeine, allowing them to enjoy the drink without the energy boost.

sugar content in mountain dew

Sugar Content in Mountain Dew

Let’s talk about the amount of sugar in Mountain Dew. Like many sodas, it has a substantial amount of sugar, around 46 grams per 12 oz serving. This isn’t surprising considering it contains high fructose corn syrup, a common sugar substitute used in many beverages. Be mindful of the sugar content in addition to your caffeine consumption when regularly drinking Mountain Dew.

diet mountain dew less caffeine and sugar

Diet Mountain Dew: Less Caffeine and Sugar?

Diet Mountain Dew is another alternative that promises a lower sugar and calorie count. But, does Mountain Dew have caffeine even in its diet variant? Yes, it does. However, it’s slightly less than the original version, with around 48 milligrams per 12 oz serving. While it’s a good lower-sugar option, the caffeine content is still there.

the history of mountain dew

The History of Mountain Dew

Delving into the history of Mountain Dew, we learn that it was invented in 1940 by Barney and Ally Hartman, owners of a Tennessee beverage bottling firm. Initially, it was designed to be a mixer for whiskey. The name actually originates from a Scottish slang term for moonshine! Over the years, Mountain Dew emerged as a popular standalone soft drink, known for its citrus flavors and notable caffeine content.

comparing mountain dew and coffee

Comparing Mountain Dew and Coffee

Does Dew have more caffeine than coffee? No, a standard cup of coffee usually has more caffeine. A caffeine soda like Mountain Dew contains less caffeine than coffee and is less likely to give you jitters. However, the high sugar level can cause a sugar crash, making coffee, in moderate amounts, a better, and healthier source of caffeine if you’re sensitive to caffeine’s effects when taken in large amounts.

alternatives to mountain dew

Alternatives to Mountain Dew

For those seeking lower caffeine products, there are plenty of alternatives to Mountain Dew. Sprite, 7up, and Fanta are all caffeine-free sodas. If you still want a bit of caffeine, but less than Mountain Dew, consider a Coca Cola or Pepsi. For those seeking a healthier option, sparkling water or herbal tea can be a refreshing choice as well.

FAQ

Does Mountain Dew contain caffeine?

Yes, Mountain Dew does contain caffeine.

How much caffeine is there in a 12 oz serving of Mountain Dew?

A 12 oz serving of Mountain Dew typically contains around 54 milligrams of caffeine.

Is there a caffeine free version of Mountain Dew?

Yes, there is a caffeine-free version of Mountain Dew available.

Does Diet Mountain Dew also contain caffeine?

Yes, Diet Mountain Dew contains caffeine, but slightly less (about 48 mg) than the original version.

Does a cup of coffee have more caffeine than Mountain Dew?

Yes, a cup of coffee usually contains more caffeine than a can of Mountain Dew.

How much sugar is there in Mountain Dew?

Mountain Dew has approximately 46 grams of sugar per 12 oz serving.

What are alternatives to Mountain Dew with less caffeine?

Sprite, 7up, and Fanta are caffeine-free alternatives to Mountain Dew.

Are there any non-soda alternatives to Mountain Dew?

Sparkling water and herbal tea can be healthier, non-soda alternatives to Mountain Dew.

Who invented Mountain Dew?

Mountain Dew was invented in 1940 by Barney and Ally Hartman.

What are the main ingredients in Mountain Dew?

The main ingredients in Mountain Dew are carbonated water, high fructose corn syrup, and citrus flavorings, among others.

Southern cabbage recipes

1 the art of southern style cabbage

1. The Art of Southern Style Cabbage

The exquisite southern cabbage recipes occupy a special place in southern cuisine traditions. The mastery in this staple dish lies in playing with flavors and textures to bring an exciting symphony on your plate. Southern style cabbage recipes usually involve a hearty combination of cabbage stewed with aromatic spices, tangy vinegar and rich meat.

To experience the best southern style cabbage, you need to be patient. It involves slow cooking that allows the flavors to marinate and seep into the cabbage. The key is simmering the cabbage uncovered for about 15 minutes. The waiting is often well rewarded with a dish that’s full of flavor.

2. The Secret Ingredient: Cajun Seasoning

One ingredient that gives southern cabbage its distinctive taste is cajun seasoning. A flavorful blend of spices, cajun seasoning elevates the flavor profile of your classic southern cabbage recipe. It usually contains elements like dried oregano, dried thyme, black pepper, white pepper, cayenne pepper, and paprika.

To really appreciate cajun seasoning in a southern cabbage recipe, you can’t just sprinkle on the spice; it needs to be integrated into the cooking process. When cooking cabbage, try adding the cajun seasoning early on to allow it to seep into the cabbage, imbuing the dish with deep, robust flavors.

3 enhance your dish with white vinegar

3. Enhance Your Dish with White Vinegar

If you thought vinegar was just for pickling, you might be surprised how it can take your southern cabbage recipes up a notch. Adding white vinegar brings that signature tangy taste, balancing the flavors while helping to break down the natural toughness of the cabbage.

White vinegar is best added during the last stages of cooking cabbage, just before you’re ready to serve. Adding it too early could result in overtly sour cabbage. Ensure you add just a splash – less is more in this case.

4 bring the sizzle with fried cabbage recipe

4. Bring the Sizzle with Fried Cabbage Recipe

Among the many recipes for southern cabbage, the fried cabbage recipe is perfect for those who enjoy a bit of crunch. Fried cabbage is tender on the inside while keeping a crispy exterior. It’s usually sautéed with bacon grease, adding that delicious meaty flavor to the cabbage.

While the fried cabbage recipe is good as it is, there’s always room for improvement. This could come in the form of additional ingredients like smoked sausage, cook bacon, or turkey bacon, adding more depth to your dish.

5 bacon grease for flavorful goodness

5. Bacon Grease for Flavorful Goodness

Adding bacon grease is a traditional Southern way to ramp up the flavor in cabbage recipes. Whether it’s a stir-fry or a slow-cooked soup, a tablespoon or two of bacon grease can take your southern cabbage recipe from basic to brilliant. As a bonus, it helps in lending those crispy edges that everyone loves.

But remember, bacon grease is quite strong, and too much of it might overpower the taste of the cabbage. Also, don’t just add the grease; cook bacon in it to create a smoky, flavorful base for your cabbage.

6 spice it up with black pepper

6. Spice It Up With Black Pepper

You can’t have a traditional southern cabbage recipe without black pepper. As simple as it may seem, black pepper adds a warmth and spiciness that effectively cuts through the cabbage’s slight bitterness, enhancing its natural flavor.

Pro tip: Instead of pre-packaged powdered black pepper, opt for freshly ground black pepper for a more aromatic and flavorful kick. And don’t limit yourself! Explore adding other spices like red pepper flakes, garlic powder, or even turmeric for a unique twist on your southern cabbage recipe.

7 enhancing the soup with chicken broth

7. Enhancing the Soup with Chicken Broth

Elevate your southern cabbage soup recipe by switching water with chicken broth. Chicken broth adds a layer of flavor and enhances the taste of the cabbage, transforming any ordinary cabbage soup into a comforting classic. It’s perfect for those chilly days when you just need a steaming bowl of comfort.

Chicken broth also brings in additional nutrients, enriching your southern cabbage recipes. If you’re going vegetarian, vegetable broth works great too. Regardless of your choice, the broth elevates the overall taste quotient.

8 lets talk about cook time

8. Let’s Talk About Cook Time

The cook time in southern cabbage recipes is crucial. Cabbage doesn’t need a lot of time to cook and can become mushy if overcooked. Depending on how you like your cabbage, most recipes require about 10-15 minutes of cooking time.

Remember, to soften your cabbage, you can simmer for about 10 minutes or until the cabbage is tender to your liking. Ensuring your cook time is correct can make or break your cabbage dish.

9 diverse variations corned beef and cabbage

9. Diverse Variations: Corned Beef and Cabbage

Corned beef and cabbage is another popular southern cabbage dish. The salt-cured beef adds a lot of flavors, while cabbage brings a refreshing lightness to the dish. Enjoyed particularly during St. Patrick’s Day, this dish is a perfect example of how versatile southern cabbage recipes can be.

The corned beef and cabbage recipe shares many components with other southern cabbage recipes but incorporates corned beef for that unique savory flavor. Just ensure that the corned beef is not overpowering so that the taste of cabbage can shine through.

FAQ

Q1: Can I use vinegar in southern style cabbage?

A1: Absolutely, white vinegar is commonly used in southern cabbage recipes to add a tangy taste and help tenderize the cabbage.

Q2: Can you include affiliate links to purchase cajun seasoning?

A2: Yes, affiliate links can be included to direct you towards trusted online shops to purchase cajun seasoning.

Q3: What’s the ideal cook time for southern style cabbage?

A3: Cook time for southern style cabbage varies depending on the recipe, but on average, cook time is about 10-15 minutes.

Q4: Can I use turkey bacon in fried cabbage recipe?

A4: Yes, turkey bacon can be a great addition to the fried cabbage recipe. It’s a healthier alternative that still provides a smoky flavor.

Q5: Can I add smoked sausage to the cabbage recipes?

A5: Indeed! Smoked sausage is a wonderful addition to southern cabbage recipes as it brings depth and meaty richness to the dish.

Q6: Is garlic powder used in southern cabbage recipes?

A6: Yes, garlic powder is often used in southern cabbage recipes to add a bit of spice and depth of flavor.

Q7: What’s the need for simmering cabbage uncovered for about 15 minutes?

A7: Simmering cabbage uncovered for about 15 minutes allows the cabbage to cook in its own juices, enhancing the flavors and tenderizing it.

Q8: Do southern cabbage recipes make good side dishes?

A8: Absolutely! Southern cabbage recipes make excellent side dishes. They pair wonderfully with meats, poultry, or fish.

Q9: Can bacon grease be substituted in southern cabbage recipes?

A9: Yes, bacon grease can be replaced with olive oil, butter, or other fats. However, do note that the flavor profile might change as bacon grease adds a distinctive taste.

Q10: Can I include red pepper flakes in the cabbage recipes?

A10: Yes, red pepper flakes can be a fantastic addition to southern cabbage dishes, giving it a spicy kick.

How long does cooked ground beef last in the fridge

safe to eat cooked ground beef

Safe to Eat Cooked Ground Beef

Is it safe to eat cooked ground beef? Yes, it is! Ground beef that has been cooked offers a myriad of meal options and is perfectly safe to eat, given it is stored correctly. Upon airing your doubts with the safety of cooked ground beef, it’s worthwhile to remember a couple of critical points. Firstly, always ensure that the meat was cooked to an internal temperature of at least 160°F (71°C) to kill off any potentially harmful bacteria.

Secondly, just as essential, if not more, is to note that the safe consumption duration of cooked ground beef relies heavily on proper storage methods. When beef is correctly stored, the risks related to foodborne diseases are significantly minimized, and the food’s quality is retained until it is ready to be consumed.

Extending the Cooked Ground Beef Last in The Fridge

To maximize the shelf life of cooked ground beef in your fridge, there are tips you can follow to extend its expiration. For instance, ensure that your refrigerator temperature is set below 40°F (4°C). Moreover, cooked meat like ground beef should go into the refrigerator within an hour or two of being cooked, less if the room temperature is very warm.

Another tip is to consider how you store the ground beef. Use sealable plastic containers or a freezer bag to eliminate excess air and limit the spread of bacteria. Following these steps will substantially help in extending the cooked ground beef last in the fridge.

identifying if cooked ground beef is good

Identifying if Cooked Ground Beef is Good

How can you tell if your cooked ground beef is good? Typically, the first sign that beef has started to spoil is when it develops a slimy texture. Moreover, you may notice a change in color, possibly a dull or brown shade as opposed to the vibrant red of fresh ground beef.

Additionally, if the ground beef has gone bad, it will develop an off or rancid smell. Consuming spoiled meat can cause foodborne illnesses, so it’s always better to be safe than sorry. If you have any doubts, it’s best to discard the meat rather than risk food poisoning.

ways to store cooked ground beef

Ways to Store Cooked Ground Beef

When it comes to how to store cooked ground beef, using the right methods can ensure that your cooked beef maintains its quality. As mentioned earlier, preservation can significantly contribute to how long cooked ground beef lasts in the fridge. Use airtight containers or freezer bags to store the cooked beef. Aim to refrigerate the beef within 2 hours following cooking to maintain the utmost freshness.

Always label your stored food with the date of storage to ensure that you consume it within its safe consumption period. Properly stored beef ought not to be kept in the fridge for more than 3-4 days to avoid health risks.

how to detect beef that has gone bad

How to Detect Beef That has Gone Bad

Discerning if your beef in the refrigerator has gone bad can save you from unnecessary health concerns. As mentioned earlier, a slimy texture is a giveaway sign that your leftovers are no longer safe to consume. Additionally, a pungent, off smell, along with a change in color (usually brown), signals that your leftover cooked ground beef has expired and should be discarded.

Keep in mind that harmful bacteria can multiply rapidly under certain conditions. So if your beef has spent more than a couple of hours out at room temperature, it’s best to throw it away rather than take the risk.

storing cooked ground beef in freezer

Storing Cooked Ground Beef in Freezer

If you don’t plan to consume the cooked beef within a few days in the fridge, consider storing it in the freezer. Cooked ground beef can last 2-3 months in the freezer if properly stored. Always use a freezer bag or airtight containers to store your beef in the freezer.

Before freezing the cooked beef, make sure it has been cooled completely in the refrigerator. Hot food can raise the temperature in the freezer, and this can potentially affect the safety and quality of other stored items.

how to defrost cooked ground beef

How to Defrost Cooked Ground Beef

How to defrost cooked ground beef correctly is crucial in retaining its taste and texture. It is best to thaw your frozen cooked ground beef overnight in the refrigerator. If you need to defrost it quicker, you may use the defrost function on your microwave.

But, bear in mind, that the meat should be cooked immediately if you are using the microwave method to avoid bacterial growth and potential ,food poisoning. Always reheat the ground beef to a temperature of at least 165°F (74°C).

reheating cooked ground beef

Reheating Cooked Ground Beef

If you choose to eat cooked ground beef that has been refrigerating, you must heat it correctly. You can reheat cooked ground beef on the stove, in the oven, or even in the microwave. Regardless of the method you choose, you must ensure that it reaches an internal temperature of 165°F (74°C) to eliminate any bacteria that could induce food poisoning.

The key to reheating cooked ground beef properly is the heat. Make sure to heat it evenly to achieve the desired temperature throughout all parts of the meat. This will ensure it is safe to consume and help to bring out the best flavor and texture.

conclusion how long does cooked ground beef last in the fridge 1

Conclusion How Long Does Cooked Ground Beef Last in The Fridge

In conclusion, properly stored cooked ground beef lasts in the fridge for 3-4 days. However, many factors can affect this duration, such as the freshness of the raw ground beef, the way it was cooked, and how it has been stored. If you can’t consume the leftovers within 3-4 days, freezing is a better option.

However, always be mindful of any signs indicating that the meat has gone bad to prevent any potential health risks. Eat consciously, store wisely, and enjoy safely!

frequently asked questions 13

Frequently Asked Questions

How much time can leftover cooked ground beef be left at room temperature?

Leftover cooked ground beef should not be left at room temperature for more than 2 hours.

Is it safe to eat cooked ground beef that’s been in the fridge for past 4 days?

Although the timeline can slightly vary, leftover cooked ground beef should generally be consumed within 3-4 days for safety reasons.

How long will frozen cooked ground beef last in the fridge?

If correctly stored, cooked ground beef can last for up to 2-3 months in the freezer.

Can you get food poisoning from old cooked ground beef?

Yes, old cooked ground beef, especially those stored improperly can induce food poisoning.

What are the signs that cooked ground beef has gone bad?

Signs include a change in color, off smell, and a slimy texture.

Can you defrost cooked ground beef in the microwave?

Yes, you can use microwave defrost settings, but the beef should then be consumed immediately to avoid bacterial growth.

How to store cooked ground beef to extend its life in the fridge?

Store the cooked beef in airtight containers or freezer bags and refrigerate it within 2 hours of cooking.

Why does ground beef turn brown in the fridge?

The ground beef may turn brown due to oxidation when it’s exposed to the air over a long time.

Does cooked ground beef need to be reheated before eating?

Although not always required, it’s beneficial to reheat the cooked beef to eliminate potential bacteria and improve the food’s taste and texture.

What’s the best way to reheat cooked ground beef?

Using a stove, oven, or microwave to reheat the beef is acceptable, as long as it reaches an internal temperature of 165°F (74°C).

How long does it take for an oven to preheat

the importance of preheating your oven

The Importance of Preheating Your Oven

When your recipe calls for a specific temperature, it’s critically important to preheat. This step ensures that your food will cook evenly and at the correct rate. It might be tempting to skip this step, especially when you’re in a rush, but skipping the preheat can result in unevenly cooked meals, or even potential food safety issues. Regardless of whether your oven runs on gas or electricity, proper preheating is essential for great cooking results.

Oven doors play a significant role in preheating, since opening the door prematurely can allow heat to escape, leading to irregular temperatures. You might believe that your oven is ready because the light indicates so, but sometimes ovens give false readings. Using an oven thermometer can help you ensure that you’ve actually reached the correct preheat temperature.

Electric Ovens Vs Gas Ovens

The type of oven you use might affect how long it takes to preheat. Commonly, electric ovens take a little longer to preheat compared to their gas counterparts. An electric oven usually requires approximately 15 to 20 minutes to reach the desired temperature. On the other hand, a gas oven generally preheats faster and can reach the desired temperature in about 10 minutes.

In addition to the time it takes to preheat the oven, the oven temperature you set will also influence the preheat time. Higher temperatures, of course, take longer to reach.

understanding preheat times

Understanding Preheat Times

On average, most modern ovens take about 15 to 20 minutes to preheat to the desired temperature. However, if your recipe approximates a preheat time of 30 minutes, it might be because the oven needs more time to achieve a higher set temperature. It’s also important to note that older ovens may take longer.

When preheating, it’s smart to start your oven before starting to prepare your dish. That way, the oven will be ready when you’re finished prepping, ensuring your cook time is not impacted by waiting for your oven to reach the right temperature.

ovens heat up differently

Ovens Heat Up Differently

Not all ovens heat up in the same way. For instance, some ovens use the broil and bake elements simultaneously during preheating to speed the process, while others only use the bake element. This difference can influence how long it takes your oven to preheat.

Convection ovens, which circulate hot air with a fan, preheat faster than conventional ovens. It’s good to remember that the location and size of your oven may factor into the time it takes to reach the desired temperature.

knowing when your oven is ready

Knowing When Your Oven is Ready

The most reliable way to know if your oven has reached the right temperature is by using an oven thermometer. While digital ovens emit a beeping sound once they’re preheated, sometimes ovens give false readings, which is why a thermometer can be handy.

Maintaining your oven well, and replacing the seal if needed, can ensure that heat isn’t escaping from the oven doors while preheating. Preserving heat within the oven will help to achieve the temperature faster.

adjusting bake time

Adjusting Bake Time

Your bake time may need adjusting if you’ve put your dish in before the oven is fully preheated. Every ingredient reacts differently to heat. For instance, baked goods might turn out denser than usual, while meat could potentially be undercooked. By always preheating your oven before the food goes in, you’ll be ensuring both the safety and the quality of your meals.

If you find that your oven takes longer than expected to preheat, it’s a good idea to have it checked. A faulty part or element might be the reason for the sluggish preheat time.

to preheat or not to preheat

To Preheat Or Not To Preheat?

There’s been a debate on whether certain types of food need an oven to be preheated or not. However, for most home cooking and baking, it’s typically better to preheat. Skipping the preheat can significantly change the taste and structure of your food.

Nevertheless, for some long, slow cooking dishes, preheating may not be necessary. Yet, when the recipe calls for a preheated oven, it’s best to follow the instructions for the perfect result.

preheat tips for a gas oven

Preheat Tips for a Gas Oven

A gas oven may preheat faster than an electric one, but it might also have hot and cold spots, depending on the flame arrangement. It’s good to turn your baking sheet halfway through the cook time for even cooking.

Allowing the oven to preheat past the desired temperature and then letting it cool down to the needed temperature can also ensure even heating in a gas oven.

How long does it take for an electric oven to preheat?

An electric oven usually takes about 15 to 20 minutes to preheat to the desired temperature.

Is it important to preheat the oven?

Yes, preheating the oven is critical as it ensures that your food will cook evenly and at the correct rate.

Can I skip the preheat step when cooking?

In general, it’s not advisable to skip the preheat step, as it can lead to uneven cooking and potential safety concerns.

Does opening the oven doors while preheating affect the temperature?

Yes, opening the oven doors prematurely during preheating can allow heat to escape and cause irregular temperatures.

Does a gas oven preheat faster than an electric oven?

Yes, a gas oven generally preheats faster than an electric oven and can reach the desired temperature in approximately 10 minutes.

How does preheating the oven affect the cook time?

Preheating the oven ensures that your food starts cooking at the correct temperature right away, affecting the overall cook time given in the recipe.

Why is my oven taking longer to preheat?

If your oven takes longer than usual to preheat, it might be due to a faulty part or element in the oven.

What temperature should the oven reach while preheating?

The oven should reach the temperature appointed in the recipe during preheating.

Does the bake time adjust if the oven is not preheated?

Yes, putting your dish in before the oven is fully preheated can potentially require an adjustment of the bake time.

How can an oven thermometer help during preheating?

An oven thermometer can help you confirm that your oven has reached the correct preheat temperature, especially if your oven sometimes gives false readings.

What temperature to wrap brisket

smoke brisket on pellet grill

Smoke Brisket on Pellet Grill

When it comes to smoking brisket on a pellet grill, the temperature plays a vital role in the cooking process. The first step is getting the temperature up to around 225°F, low and slow is the key to a juicy and tender brisket. Once the brisket hits an internal temperature of 160-170°F, that’s the perfect moment to wrap it.

Wrapping brisket is a method often referred to as the Texas Crutch. This technique involves wrapping the brisket during the midpoint of the cooking process. Doing so helps soften the meat, ensures tenderness, and may speed up our cooking times somewhat.

Wrapping Brisket in Butcher Paper

You might wonder, “Why use butcher paper?”. Wrapping brisket in butcher paper is a popular technique because butcher paper, especially pink butcher paper, allows the meat to breathe, thus preserving the hard-earned bark from the smoking process. Unlike using aluminum foil, butcher paper will not create a steaming effect during the cooking process, which can make the bark mushy.

Aside from that, pink butcher paper is also a heavy-duty paper that could withstand heat and the meat’s juiciness. It is excellent for preserving the smoke flavor and crust, otherwise known as the bark.

foil or butcher paper for wrapping

Foil or Butcher Paper for Wrapping

The question of whether to use foil or butcher paper for wrapping brisket is a common one. While both methods have their proponents, the ultimate decision is yours based on your desired results.

Aluminum foil, on one hand, increases cooking speed because it creates a tightly sealed package that traps steam. But on the downside, this means the smoke flavor can no longer penetrate the meat, and it may soften the bark. Butcher paper, on the other hand, offers the best balance between maintaining a good bark and preventing the meat from drying out.

optimum temperatures for brisket cooking

Optimum Temperatures for Brisket Cooking

Temperature control is paramount when you’re aiming for a perfectly cooked brisket. Once you smoke brisket and the internal temperature reaches 160-170 degrees Fahrenheit, then comes the wrapping stage.

After wrapping up your brisket, continue to cook until the internal temperatures reach 200-203 degrees Fahrenheit. This is the sweet spot where your brisket will be tender, moist, and full of flavor.

unraveling the cooked brisket

Unraveling the Cooked Brisket

Once you’ve reached the optimal internal temperature, it’s time to remove the cooked brisket from the grill. However, that doesn’t mean it’s ready to slice and serve. It needs to rest first.

Letting your brisket rest after cooking is just as integral a step as any other in the process. While the brisket rests, the juices redistribute throughout the meat, resulting in a juicier brisket. A proper rest period can take anywhere from 30 minutes to a couple of hours.

should you wrap your brisket

Should You Wrap Your Brisket?

Many pitmasters choose to wrap their brisket halfway through the cooking process. Wrapping helps to retain the meat’s moisture, speeds up the cooking process, and can even improve the meat’s taste and texture.

However, wrapping is not mandatory. Some BBQ enthusiasts prefer the “no wrap” method, believing that forgoing the wrap results in a better bark and a deeper smoke flavor.

the pros of wrapping with heavy duty aluminum foil

The Pros of Wrapping With Heavy-Duty Aluminum Foil

Heavy-duty aluminum foil is highly resistant to tears and punctures — it’s ideal for wrapping and re-wrapping heavy cuts of meat like brisket. If you wrap in aluminum foil, the meat will cook faster because it will be in a steamy environment.

But one must remember that aluminum foil will soften the brisket’s bark, but in return, speeds up the cooking process and results in a tender and juicy brisket.

the wizardry of the brisket fat side

The Wizardry of the Brisket Fat Side

The brisket fat side can be a source of confusion for many BBQ enthusiasts. Should you smoke it fat side up or down? There’s no definitive answer to this question as it depends on your cooking method and personal preference.

If you smoke brisket fat side down, the layer of fat will help protect the meat from the heat. Conversely, if you smoke it with the fat side up, the fat can self-baste the meat during the cooking process.

What temperature should you wrap a brisket?

You should wrap your brisket when it hits an internal temperature between 160-170°F.

Is it better to wrap a brisket in foil or butcher paper?

Wrapping in butcher paper enhances the smoke flavor and bark quality, while foil speeds up the cooking process and makes the brisket tender.

Why do you wrap a brisket?

Wrapping a brisket helps retain moisture, speed up cooking times, and enhance the meat’s texture.

Is pink butcher paper necessary for brisket?

Pink butcher paper is not necessary but beneficial for preserving the smoke flavor and crust.

Is it okay to smoke a brisket without wrapping it?

Yes, it is okay. Not wrapping the brisket would result in a better bark and a deeper smoke flavor.

What happens if I don’t wrap my brisket?

Your brisket may be drier, and it will take longer to cook.

What is the Texas Crutch?

The Texas Crutch is a technique involving wrapping the brisket during the midpoint of cooking to improve tenderness and cooking speed.

At what internal temperature is brisket done?

A brisket is done when the internal temperature reaches 200-203°F.

Does brisket fat side impart flavor?

The fat does not permeate the brisket but can self-baste the meat during the cooking process.

What material is the heavy-duty aluminum foil?

The heavy-duty aluminum foil is a highly durable and resistant material ideal for wrapping heavy cuts of meat like brisket.

Snow crab vs king crab

understanding the types of crabs crab and snow crab crab and king crab

Understanding the Types of Crabs: Crab and Snow Crab, Crab and King Crab

Crabs are popular seafood delicacies showcased in top-tier seafood markets around the world. There are various types of crabs including the crab and snow crab, crab and king crab. The crab species found in different ocean bodies offer distinctive taste experiences for taste buds.

Where to eat crab dishes is determined by the type but also the origin of the crab. For instance, snow crab and king crab from the North Pacific Oceans are acclaimed for their unique flavor profiles, and are often featured on high-end seafood menus.

Knowledge on Different Crab Sizes: Snow Crab vs King Crab, 20 Pounds

When contemplating snow crab vs king crab, size becomes a significant factor. A standard snow crab leg usually weighs around 2 to 4 ounces. On the contrary, a single king crab leg often weighs a hefty 20 pounds.

However, size doesn’t always dictate the price. Even though king crabs have thicker legs, they may not always be more expensive than other types of crabs. Instead, prices are dependent on availabilities and in-demand trends in various seafood markets.

unraveling the differences king crab legs vs snow crab legs

Unraveling the Differences: King Crab Legs vs Snow Crab Legs

Although characterized by their similar appearances, snow crab and king crab differ notably when it comes to their legs. King crab legs are broader, spikier, and denser, whereas snow crab legs are typically slender and smoother.

This difference in structure also impacts their taste. King crabs have a robust texture, while snow crab legs offer a sweet and delicate flavor. Therefore, depending on your taste buds, you may prefer one over the other.

snow crabs harvesting season and flavor profile

Snow Crabs: Harvesting Season and Flavor Profile

Much adored by seafood lovers, snow crab legs, are commonly harvested during late winter and early spring. Their harvesting season and unique taste buds experience have escalated their popularity in seafood markets.

Snow crabs have a mild and sweet flavor profile, usually served with clarified butter and lemon. These crabs are often suggested to those who prefer a subtle and less overwhelming crab taste that delights the palate in an elegant manner.

king crabs the alaskan king crab delight

King Crabs: The Alaskan King Crab Delight

The colossal Alaskan king crab is a renowned delicacy in the crab sphere. The catching season of these massive crabs usually starts in October and lasts until January, making them a special attraction for the fall and winter seafood markets.

With its flavorful and succulent meat contained within its thicker legs, the Alaskan king crab provides an unforgettable eating experience. Usually paired with clarified butter or a tangy sauce, king crab is an undeniable feast for crab lovers.

alaskan snow crabs pre cooked delights

Alaskan Snow Crabs: Pre-Cooked Delights

Whether you’re a seafood connoisseur or an occasional crab eater, the pre-cooked Alaskan snow crab should be on your try list. A staple in seafood markets, these crabs tantalize taste buds with their unique, mild, sweet, and slightly briny flavor profile.

Another reason behind their popularity is the ease of preparation. As they come pre-cooked, all that’s needed is a quick steam or boil to heat them up before they’re ready to eat, making them a convenient choice for crab enthusiasts.

how to enjoy crabs accompaniments and side dishes

How to Enjoy Crabs: Accompaniments and Side Dishes

Whether it’s a snow crab or a king crab, foodies love pairing it with comforting sides and sauces. Clarified butter often tops the list of accompaniments, as the crabs’ mild, sweet flavor is beautifully magnified when dipped into warm, melted butter.

Additionally, snow and king crabs can be served with a variety of sides like creamy coleslaw, crisp green salad, or spicy Cajun potatoes. Overall, these hearty crabs are versatile, giving each meal a new twist for your taste buds.

seafood markets a crab lovers paradise

Seafood Markets: A Crab Lover’s Paradise

Seafood markets around the world display a stunning range of crab species, catering to varied preferences and taste buds. The offerings are endless, from snow crab to king crab and everything in between.

Whether you fancy a delicate snow crab leg or a meat-filled king crab leg, seafood markets are the hotspot to explore these delicious crustaceans. Just remember to visit in the right season to catch your favorite crab at its peak!

in conclusion the mantle of superiority snow crab vs king crab

In Conclusion: The Mantle of Superiority – Snow Crab vs King Crab

Choosing between snow crab and king crab is matter of personal preference. While some may opt for the subtler snow crab for its dreamy texture and delicate taste, others may gravitate towards the meaty king crab for its rich, mouth-filling flavor.

In the end, whether you lean towards the snow crab’s light, sweet flavor or the king crab’s robust, briny taste, both types of crab make for a memorable seafood feast.

1. Which crab has thicker legs: snow crab or king crab?

King crab has thicker legs compared to snow crab.

2. When is the harvesting season for snow crabs?

The harvesting season for snow crabs is usually from late winter to early spring.

3. How large can a single king crab leg get?

A single king crab leg can weigh up to 20 pounds.

4. Are king crab legs often pre-cooked in seafood markets?

Yes, king crab legs and other types of crab are often pre-cooked for convenience in seafood markets.

5. How are snow crab legs typically served?

Snow crab legs are typically served with clarified butter and lemon.

6. Where can I find different crab species?

Different crab species can easily be found in seafood markets around the world.

7. What is the taste profile of the Alaskan king crab?

The Alaskan king crab has a rich and full flavor with a slight hint of sweetness.

8. Can you suggest an easy-to-prepare crab type?

The pre-cooked Alaskan snow crab is a very easy-to-prepare crab type.

9. What are the differences in taste between snow crab and king crab?

Snow crabs have a mild and sweet flavor, while king crabs have a stronger, meaty flavor.

10. Do Alaskan king crabs come from the North Pacific Oceans?

Yes, Alaskan king crabs are harvested from the North Pacific Oceans.

How long to smoke pork shoulder at 225

stronghow long to smoke pork shoulder at 225 a comprehensive guidestrong

How long to smoke pork shoulder at 225: A Comprehensive Guide

Deciphering the puzzle of “how long to smoke pork shoulder at 225” is not as straightforward as it seems. The answer to this question largely depends on the size of the smoking cut and several other factors. Let’s delve deeper.

The task of smoking a pork shoulder may seem daunting for beginners. However, it’s essential to understand that the process is not complex. Keep in mind that the procedure will take a considerable amount of time and patience.

Understanding the Boston Butt Cut of Meat

The term ‘Boston Butt’ refers to a particular cut of meat from the pork shoulder. This portion is often used for smoking because it contains hefty connective tissues, which can impact the cook time.

A well-cooked Boston butt cut should be moist, tender, and flavorful. However, if overcooked, this cut can become exceedingly dry and tough. Therefore, it’s critical to monitor the internal temperature of the cut accurately.

strongfactors influencing the smoking processstrong

Factors Influencing the Smoking Process

Smoking a pork shoulder at 225 degrees Fahrenheit can lead to delectable smoked meats. However, the notion of how long to smoke pork shoulder at 225 heavily depends on the size of the cut. Generally, it takes about 1.5 to 2 hours per pound of meat at this temperature.

Moreover, the density and shape of the meat, and even the smoker’s design, can speed up the cooking process or prolong it. Yet, don’t stress. Invest in a good quality meat thermometer to smoke pork shoulder at 225 degrees for a hassle-free experience.

strongthe importance of internal temperaturestrong

The Importance of Internal Temperature

While smoking your pork shoulder, reaching an ideal internal temperature is crucial. Aim to reach an internal temperature of around 195-205°F for a tender and juicy result.

Monitoring the internal temperature isn’t only for taste and texture, but crucially for safety too. Ineffectively heated meats may bear bacteria leading to food-borne illnesses. Therefore, temperature regulation measures are essential when cooking pork shoulder.

stronghow to maneuver the meat in the smokerstrong

How to Maneuver the Meat in the Smoker

Once you place your pork shoulder in the smoker, it becomes imperative to exactly know when to remove it from the smoker. Remember not to rush this process as it may affect the meat’s tenderness.

Also, once you remove it from the smoker, it’s wise to let the meat rest for a while. Over time, the delicious juices will redistribute within the meat, enhancing the overall flavor profile.

strongavoiding dry and tough meatsstrong

Avoiding Dry and Tough Meats

Over-smoking your cut can lead to dry and tough meat. Consistently flipping and testing the pork shoulder will ensure it doesn’t lose its succulence.

Also, bear in mind that softening the connective tissues in the cut is vital for a tender result. Cooking pork shoulder at 225 degrees Fahrenheit renders these tissues to a gelatinous consistency, which in turn makes the meat tender.

strongfactors affecting the cook timestrong

Factors affecting the Cook Time

Accurately estimating the cook time is crucial. As previously mentioned, the time depends on various factors, such as the cut’s shape and size, and even the model of your smoker.

Another crucial factor to bear in mind is the temperature consistency in your unit. Regularly maintaining the smoker’s temperature at 225 degrees Fahrenheit is paramount to prevent overcooking.

strongconclusion how long to smoke pork shoulder at 225 degreesstrong

Conclusion: How long to smoke pork shoulder at 225 degrees?

In conclusion, how long to smoke pork shoulder at 225 degrees requires considering several factors. The process usually takes around 1.5-2 hours per pound of meat, but this may fluctuate depending on the aspects mentioned above.

During the smoking process, ensure the consistent monitoring of the internal temperature, allowing your meat to rest post-smoking and most importantly, be patient for the flavors to develop. Happy smoking!

strongfaqsstrong 1

FAQs

Q1: Why should I monitor the internal temperature while smoking?

Monitoring the internal temperature is crucial to estimating when the meat is thoroughly done and safe to eat.

Q2: Why should the meat rest before serving?

When you let the smoked meat rest, it allows the juices to redistribute within the cut, enhancing flavor and tenderness.

Q3: How can I keep my meat from becoming dry and tough?

By maintaining a consistent smoking temperature and regularly testing the pork shoulder, you can ensure it remains juicy and tender.

Q4: What is the significance of the cut’s size when smoking?

The size of the cut primarily determines the duration required for smoking. Bigger cuts require a longer smoking process.

Q5: Why is maintaining the smoker’s temperature at 225 degrees Fahrenheit imperative?

Maintaining a consistent temperature of 225 degrees Fahrenheit ensures the meat is evenly cooked.

Q6: What might speed up the cooking process?

The design of your smoker, and the cut’s shape and density, may influence the cooking time.

Q7: Can an improper cook lead to food-borne illnesses?

Yes, improperly cooked meat may contain bacteria that can lead to food-borne illnesses.

Q8: How does overcooking affect the meat’s texture?

Overcooking can result in the meat becoming extremely dry and chewy.

Q9: Do connective tissues in the cut affect the cooking?

Yes, connective tissues in the cut should be softened properly for a tender result.

Q10: How reliable are meat thermometers in smoking?

A reliable meat thermometer can greatly simplify the smoking process by ensuring optimal and safe internal temperatures.

How long does it take for water to boil

understanding boiling point the temperature is boiling point

Understanding Boiling Point: The Temperature is Boiling Point

Understanding the boiling point of water is key to knowing the answer to, “how long does it take for water to boil?” The boiling point refers to the temperature at which a liquid becomes a vapor. For water, the typical boiling point is 100 degrees Celsius or 212 degrees Fahrenheit. However, this can vary depending on your location and the atmospheric pressure. It’s higher at sea level and decreases as you gain altitude.

One helpful tip to know is that water does not instantly start boiling when it reaches these temperatures. It takes time for the heat energy to convert the water molecules into steam. This is why it’s crucial to allow your water to reach a full boil before using it for cooking or hot drinks.

Time Duration on an Electric Stove

The time to bring water to boil depends on several factors, including the heat source. For instance, boiling water on an electric stove can take a bit longer than on a gas stove. Generally, it can take about 10 to 15 minutes for a liter of water to boil.

Note that your pot’s size and material can influence the boiling time as well. For instance, in a smaller pot or one made of an efficient conductor like copper, the water may boil faster. Conversely, a larger pot or one made from a material like cast iron may lengthen the boiling time.

how many minutes to boil a cup of water

How Many Minutes to Boil a Cup of Water?

Whether you prefer a warm tea or instant soup, there are instances where a cup of water is more appropriate. In such cases, how many minutes to boil is commonly asked. On an electric stove, it generally takes anywhere between 1 to 3 minutes.

This duration, however, is not definitive and might vary based on your stove’s temperature settings and the initial temperature of your water. For instance, if you are starting with cold tap water, it might take slightly longer.

does boiling water make it safe to drink

Does Boiling Water Make it Safe to Drink?

Many people boil water to make it safe to drink. Boiling is indeed an effective way of killing numerous pathogens, and a water safe to drink is a goal worth striving for.

Boiling does not remove all impurities. Chemical contaminants and some hardy germs may survive this process. Thus, if the tap water source is questionable, it’s wise to use additional treatment methods like filters or tablets.

using electric kettles and microwaves

Using Electric Kettles and Microwaves

The quickest way to boil water can often be using an electric kettle. It takes about 2 to 3 minutes to boil a cup of water using this appliance, making it a highly efficient option.

On the other hand, the time it takes to boil water in a microwave also depends on the microwave’s wattage. On a high setting, it generally takes 1 to 2 minutes for a cup of water, making microwaves another speedy alternative for boiling water.

importance of purified water

Importance of Purified Water

Using purified water can change the boiling point slightly, as impurities in the water can elevate the boiling temperature. For the best results in your tea, coffee, or cooking, consider using purified water.

Equally important, boiling water completely purify it, right? Unfortunately, no. While boiling water can kill many bacteria, viruses, and parasites, it does not remove chemical pollutants. Boiling should be one step in a process, not the entire process.

different tools for different boiling times

Different Tools for Different Boiling Times

Various kitchen tools can offer different boiling times. For instance, a standard stovetop pot is slower compared to an electric kettle or a microwave. On the other hand, the time to bring hot water to boil will evidently be quicker than starting from room temperature.

Your choice would depend on your preferred balance between time efficiency and the flavor or taste results you aim to achieve.

bringing water to a boil quickly

Bringing Water to a Boil Quickly

There are a few tricks to bringing water to boil quickly. One of the obvious ones is to use hot tap water instead of cold – you’ve given yourself a head start on the heating process.

Covering the pot also traps heat and speeds the process. Lastly, using an electric kettle or microwave can reduce the boiling time dramatically.

the boiling process step by step

The Boiling Process: Step by Step

For the most part, the boiling process is straightforward. Ensure the water is at full boil for whatever you’re preparing. This minimal precaution can make a significant difference in both safety and quality.

Remember to allow the water to boil for at least one minute to maximize the elimination of pathogens.

FAQ

How long does it take water to reach a full boil on an electric stove?

On an electric stove, it usually takes about 10 to 15 minutes for a liter of water to reach a full boil.

What temperature is the boiling point for water?

Water boils at 100 degrees Celsius or 212 degrees Fahrenheit.

How many minutes does it take to boil a cup of water?

On an electric stove, it typically takes between 1 to 3 minutes to boil a cup of water.

Does boiling water make it safe to drink?

Boiling water can kill many pathogens, making it safer to drink. However, it doesn’t remove chemical contaminants.

How long does it take to boil water in an electric kettle?

It takes about 2 to 3 minutes to boil a cup of water in an electric kettle.

Can you quickly boil water in a microwave?

Yes, it typically takes between 1 to 2 minutes for a microwave to boil a cup of water.

Does boiling water completely purify it?

Boiling can kill most germs, but it does not remove chemical pollutants.

Does purified water boil at a different temperature?

Purified water usually boils at 100 degrees Celsius, just like regular water. However, impurities can raise the boiling temperature.

What is the quickest way to boil water?

Using an electric kettle or a microwave can significantly cut down the boiling time.

Does starting with hot tap water boil faster?

Yes, starting with hot tap water will boil faster than cold tap water.

How much are 20 pc mcnuggets

how much are 20 pc mcnuggets 1

How Much are 20 Pc McNuggets?

If you’re wondering “how much are 20 pc mcnuggets“, the cost varies depending upon the location and region. However, on average, you can expect to spend around $5 to $8 for a 20-piece mcnugget at McDonald’s. It’s crucial to note that prices may change due to factors like promotions offered and other varying elements. Remember to check the latest prices in your area before buying 20 pc mcnuggets.

The cost-effectiveness of the 20 piece mcnuggets makes them a popular choice among customers. For instance, it is often cheaper to buy a large piece mcnugget at McDonald’s compared to smaller orders, making it a pretty good deal for those who are after a generous serving of nuggets at McDonald’s.

Chicken Breast in McNuggets

In the world of fast food, it’s always good to know what you’re eating. The main ingredient in McDonald’s chicken mcnuggets is white meat chicken, more specifically, chicken breast. This explains the tenderness and unique taste of the nuggets, making McDonald’s a go-to place for nugget lovers.

McDonald’s ensures a quality chicken breast to make their delicious nuggets. Whether it’s a spicy mcnuggets meal or your conventional 20-piece chicken mcnuggets order, quality is an integral part of McDonald’s dishes, making them favorites for many customers across the globe.

the calorie count in a 20 piece mcnuggets order

The Calorie Count in a 20-Piece McNuggets Order

Curious about “how many calories are in 20 nuggets from McDonald’s?” In a 20 piece mcnugget order, there are approximately 840 calories. Yes, you read it right! Make sure to take into account the nutritional aspects when enjoying a delicious mcnugget meal at McDonald’s.

However, keep in mind that a chicken mcnuggets meal doesn’t just consist of nuggets but also includes your choice of sides like fries or apple slices and a soda. This can increase the total caloric intake from your mcnugget meal.

diners favorite the sauces

Diners’ Favorite: The Sauces

McNuggets and dipping sauces are inseparable. One of the pleasures of eating nuggets at McDonald’s is enjoying them with a variety of dipping sauces. The most popular among diners is probably the Honey Mustard. Its balance of sweetness and tanginess compliments the chicken nuggets perfectly.

Next in line are Sweet ‘n Sour, Barbecue, and Spicy Buffalo. Additionally, for those who crave a bit of heat with their nuggets, the Spicy McNuggets with their Hot Mustard or Mighty Hot Sauce will certainly hit the spot.

mcdonalds special the uk mcnugget

McDonald’s Special: The UK McNugget

For nugget enthusiasts in the UK, the cost queries remain similar. Queries like *mcnugget UK price, or how much are 20 pc mcnugget orders in the UK are common. The price, similar to the US, varies depending on location but is generally around £4.69 for a 20-piece box.

Given the quality, taste, and affordability of the 20 piece mcnuggets, it’s no surprise that they remain a popular choice. McDonald’s nuggets have a reputation that transcends borders.

discounts strongemmcdonalds chicken mcnuggetsemstrong promotions

Discounts: McDonald’s Chicken McNuggets Promotions

Often, McDonald’s runs special deals and promotions, presenting customers with an opportunity to save money while enjoying their favorite foods. These deals might include 20-piece mcnugget orders and offer significant savings compared to purchasing them individually.

Such deals come around frequently, so it’s always a good idea to stay updated about the latest offers and promotions at McDonald’s. This way, you can continue enjoying your favorite McDonald’s chicken nuggets without drilling a hole in your pocket.

FAQ

How much are 20 pc mcnuggets at McDonald’s?

The price varies depending upon the region and location, but on average, it costs around $5 to $8 for a 20-piece mcnugget meal at McDonald’s.

What meat is used in McDonald’s nuggets?

McDonald’s Chicken McNuggets primarily use chicken breast in their recipe.

How many calories are in a 20-piece mcnugget meal at McDonald’s?

In a 20-piece McNugget, there are approximately 840 calories. Keep in mind additional calories from the sides and drinks that accompany the meal.

Do McDonald’s chicken nuggets have any discounts or promotions?

Yes, McDonald’s often runs special promotions that may include 20-piece chicken mcnuggets. Keep an eye on their latest deals to save some money.

What is the price of a 20-piece mcnugget at McDonald’s in the UK?

The price varies depending on location, but generally, it’s around £4.69 for a 20-piece box of McNuggets in the UK.

Is it cheaper to buy a 20-piece mcnugget than smaller portions?

Yes, it’s often more cost-effective to buy a 20-piece mcnugget than smaller portions.

What are the popular dipping sauces for McNuggets at McDonald’s?

Popular choices include Honey Mustard, Sweet ‘n Sour, Barbecue, and Spicy Buffalo.

Is Spicy McNugget available at all McDonald’s outlets?

Most McDonald’s outlets offer Spicy McNuggets. However, availability may vary depending on location and regional preference.

Are 20-piece McNuggets always available at McDonald’s?

Yes, 20-piece McNuggets are a staple offering on the McDonald’s menu and are typically available at all outlets.

Do calories count for McNuggets include dipping sauces?

No, the stated caloric count for McNuggets does not include dipping sauces. They are calculated separately.

What is pepperoni made of

what goes into making pepperoni the core ingredients

What Goes Into Making Pepperoni: The Core Ingredients

Nothing defines a delicious pizza more than those little red, spicy salami rounds. But what is pepperoni made of? Traditionally, pepperoni is a blend of beef and pork, mixed with spices such as paprika, garlic, black pepper, crushed red pepper, and fennel. These ingredients are then cured and smoked to create the distinct flavor and texture we love.

Featuring both beef and pork is not a strict rule in making pepperoni. There are also 100% beef variants or pork only pepperoni. Regardless of where the meat comes from, one aspect that remains consistent is the curing process. The true essence of pepperoni as a cured meat lies in its carefully treated and aged composition.

The Role of Lactic Acid in Pepperoni

A primary ingredient that plays a crucial role in the creation of pepperoni is lactic acid. This is a natural byproduct of the curing process, which adds a tangy kick to the pepperoni and aids in its preservation. By converting sugars into lactic acid, a desirable sour flavor is achieved.

The lactic acid also helps in reducing the fat content in pepperoni. The acid breaks down the fat and oil, reducing their quantity in the finished meat product. Thus, eating pepperoni can be a bit guilt-free when considering the somewhat lower fat content!

pepperonis italian immigrants origin

Pepperoni’s Italian Immigrants Origin

The spicy salami known as pepperoni actually owes its current popularity to Italian immigrants who brought the recipe to the United States in the early 1900s. However, the pepperoni we know today is quite different from its Italian roots. The original Italian snack was made from pepperoni pork and spiced with chili pepper.

Interestingly, the term ‘pepperoni’ is a misnomer. The Italian word for bell pepper is actually pepperoni. The Americans adopted this term for the spicy salami, and the name stuck.

pepperoni from mozzarella cheese to pepperoni slices

Pepperoni: From Mozzarella Cheese to Pepperoni Slices

It’s hard to imagine a timeless combination like pepperoni slices and mozzarella cheese as revolutionary, but it was. When Italian immigrants in the early 1900s starting combining pepperoni and mozzarella – it was a game-changer for pizza toppings.

Thanks to their rich, spicy, and profoundly flavorful blend, these ingredients have become a staple in pizza eateries worldwide. From a traditional wood-fire Italian pizzeria to a take-out store in downtown Manhattan, you can never go wrong with a layer of mozzarella cheese topped with pepperoni slices.

the popularity of pepperoni in the united states

The Popularity of Pepperoni in the United States

Pepperoni has seen rising popularity in the United States, becoming a favorite pizza topping for many. Thanks to the unique blend of spices in its composition coupled with the curing process, this spicy salami has carved a niche in Americans’ hearts and stomachs.

Aside from households and pizza parlors, pepperoni is also a preferred sandwich filling and breakfast meat. It’s undeniable that the love for pepperoni has transcended beyond pizza to other culinary delights, stealing the show as a staple in American food culture.

differentiating your pepperoni cooked pepperoni

Differentiating Your Pepperoni: Cooked Pepperoni

While pepperoni is popularly served raw in pizzas, other forms are equally delicious. One such type is cooked pepperoni. When pepperoni is cooked, it gives off a different delicious flavor profile that’s a welcome twist on the traditional topping.

Cooking pepperoni helps to enhance its flavor as the heat from the cooking process melts the fat in the salami, allowing the spicy, smoky flavors to fully permeate throughout the meat. The result? A more pronounced and robust flavor that’s nothing short of amazing!

the many types of pepperoni

The Many Types of Pepperoni

Although pepperoni is a type of salami, it comes in various forms. As earlier mentioned, there are beef and pork pepperonis and pork only pepperonis. But did you know that there are 100% beef pepperonis too? Yes, pepperoni is a type of salami that can be versatile in what type of meat it uses!

Aside from that, the types of pepperoni can also differ based on where they are made. For example, pepperoni produced in one region may have a different taste and ingredient profile than those made in another region.

the journey from spicy salami to pepperoni

The Journey from Spicy Salami to Pepperoni

Though pepperoni did start as a spicy salami introduced by Italian immigrants, it has since evolved into a beloved American snack. It’s interesting to note that even though the name ‘pepperoni’ came from the Italian word for bell pepper, this cured meat doesn’t contain any bell peppers.

Ever since its introduction in the early 1900s, pepperoni has been a favorite choice of cured meat for many Americans. From pepperoni pizzas to sandwiches, this versatile ingredient has continued to please the palate of the nation.

FAQ

Why do pepperoni slices curl up when cooked?

Pepperoni slices curl when cooked due to the casing that shrinks more than the meat, causing the edges to curl up.

Do Italian immigrants eat cooked pepperoni?

Yes, however, cooked pepperoni is more common in American cuisine.

Can pepperoni be 100% beef?

Certainly. Although traditionally made from a blend of beef and pork, 100% beef pepperoni variants do exist.

Do lactic acid and fat content contribute to pepperoni’s taste?

Lactic acid provides a tangy kick to pepperoni, and fat content enriches its flavor.

What is pepperoni pork?

It’s pepperoni made exclusively from pork.

Can pepperoni be eaten raw?

Pepperoni can be eaten raw or cooked, considering it has been cured and dried.

What is the connection between the Italian word for bell pepper and pepperoni?

“Pepperoni” is the Italian word for bell pepper, but the Americans adopted the term to describe the spicy salami.

Why is pepperoni so popular in the United States?

Pepperoni has a distinct, spicy flavor and is a versatile ingredient used in pizzas, sandwiches, and various other dishes, which contribute to its popularity.

Why is pepperoni considered a type of salami?

Pepperoni is considered a type of salami due to the similar preparation methods, main components, and the process of curing involved.

Why do most pepperoni pizzas use mozzarella cheese?

Mozzarella cheese has a mild flavor that complements the spiciness of the pepperoni slices without overwhelming them.

Does sierra mist have caffeine

Curious about what’s in your soda? One of the top questions people ask is, “Does Sierra Mist have caffeine?” While drinking Sierra Mist, understanding each ingredient can help you make better dietary choices. This blog will cover what goes into making Sierra Mist and address your caffeine concerns.

sierra mists ingredients what makes it unique

Sierra Mist’s Ingredients: What Makes it Unique?

It’s always wise to look into the ingredients in Sierra Mist before consuming. Sierra Mist is made using carbonated water, high fructose corn syrup, citric acid, natural flavors, and preservatives. Unlike many popular soft drinks like Coca-Cola, this lemon lime flavored soft drink doesn’t contain caffeine. The absence of caffeine in Sierra Mist makes it one of the caffeine free alternatives you can enjoy.

Sierra Mist has a clear stand on using high fructose corn syrup as a sweetener. Although it’s an additive ingredient, its use is considered safe when consumed in moderation. The other sweetening alternative used is real sugar. This is a significant fact about Sierra Mist, as it often uses real sugar and natural ingredients instead of artificial sweeteners.

Does Diet Sierra Mist Contain Caffeine?

Switching to diet drinks often raises questions about ingredient changes. Although Diet Sierra Mist has fewer calories, its recipe remains largely unchanged. It still retains the signature lemon-lime flavor while abstaining from caffeine.

The flavor change in Diet Sierra Mist doesn’t alter its caffeine content or lack thereof. Similarly, Sierra Mist Zero Sugar, a recently added variant, also does not contain caffeine. Even as the name and packaging have changed over time, one thing remains the same—the caffeine content in Sierra Mist is zero.

the presence of carbonated water in sierra mist

The Presence of Carbonated Water in Sierra Mist

Carbonated water is the primary base for any soft drink, including Sierra Mist. It gives the drink its bubbly texture, which provides a pleasant sensation while drinking. Carbonated water, although a simple ingredient, works wonders in contributing to the overall taste and mouthfeel of Sierra Mist.

In relation to the question about caffeine content, the presence of carbonated water has no bearing on whether or not Sierra Mist contains caffeine. In fact, it is inherently caffeine-free. The carbonated water in Sierra Mist is an naturally occurring ingredient, and it is just one of several factors that ensures Sierra Mist remains a caffeine-free beverage.

artificial sweeteners and their role in sierra mist

Artificial Sweeteners and Their Role in Sierra Mist

Sierra Mist stands out from its competitors due to its avoidance of artificial sweeteners. This soda’s sweetness comes predominantly from high fructose corn syrup and real sugar, which also contribute to its unique citrus flavor.

With a rising focus on health-conscious ingredients, it’s essential to note the decision of PepsiCo—the company that owns Sierra Mist—to abandon artificial sweeteners in its recipe. Sierra Mist’s apparent naturalness extends into its caffeine content, ensuring that the question, “does Sierra Mist have caffeine” receives a negative response, which can prove to be a relief for many caffeine-sensitive soda drinkers.

how sierra mist incorporates citrus flavors

How Sierra Mist Incorporates Citrus Flavors

If you’ve ever wondered why Sierra Mist has such a refreshing taste, the answer lies in its citrus flavors. These include lemon and lime—we all know how these sensual flavors bring a summer vibe to any drink. In Sierra Mist, these flavors are not just additives; they are natural extracts, lending to its authentic taste.

Again, the citrus flavors’ presence does not impact the caffeine content in Sierra Mist. So, even with these lovely citrusy infusions, this drink remains a caffeine-free soda which even caffeine sensitive individuals can enjoy without fear.

what makes sierra mist a caffeine free alternatives

What Makes Sierra Mist a Caffeine Free Alternatives?

Sierra Mist’s caffeine-free status makes it ideal for individuals who want to enjoy a refreshing soda without the jolt of caffeine. When drinking Sierra Mist, you can be confident in your choice because you are consuming a drink with zero caffeine.

With increased awareness and a global move towards healthier food choices, there’s a growing demand for caffeine-free alternatives. Sierra Mist successfully caters to these demands. It’s not just the lack of caffeine, but the authentic, natural citrus flavors that make Sierra Mist a desirable soda option.

understanding caffeine content in sierra mist

Understanding Caffeine Content in Sierra Mist

To conclude, Sierra Mist, regardless of its variant—be it the classic version, the diet version, Mist Twst, or Sierra Mist Zero Sugar—does not, indeed, contain caffeine. This is verified information from PepsiCo itself, confirming that the caffeine content in Sierra Mist is none.

This conclusion brings satisfaction to those who love the refreshing soda but prefer to avoid caffeine. Thanks to Sierra Mist, you can continue to enjoy a fizzy, refreshing soda without worrying about any caffeine-related side effects.

so strongdoes sierra mist have caffeinestrong conclusion

So, “Does Sierra Mist Have Caffeine?” — Conclusion

The conclusion does Sierra Mist have caffeine is quite simple — No, it doesn’t. Whether you’re sipping on a can of the original Sierra Mist, exploring the Diet Sierra Mist, or trying out the new Sierra Mist Zero Sugar, you are partaking in a refreshing, caffeine-free beverage.

Despite the varying sweeteners used, from real sugar to high fructose corn syrup, and the delightful blend of lemon and lime flavors, Sierra Mist stands proudly caffeine-free. It’s a fact that emphasizes the brand’s commitment to offering versatile, enjoyable drink options that appeal to a broad audience, including those avoiding caffeine.

frequently asked questions faqs 4

Frequently Asked Questions (FAQs)

Why doesn’t Sierra Mist have caffeine?

Sierra Mist doesn’t contain caffeine as it’s formulated to be a caffeine-free beverage. This allows it to cater to a wider audience, including those who prefer or need to avoid caffeine.

Are any artificial sweeteners used in Sierra Mist?

No, Sierra Mist does not use any artificial sweeteners. It uses high fructose corn syrup and real sugar as sweeteners.

What is the difference between Sierra Mist and Mist Twst?

Mist Twst was a rebranding of Sierra Mist. The ingredients remained mostly the same, and importantly, it remained a caffeine-free soft drink.

Is the caffeine content in Diet Sierra Mist different from the regular Sierra Mist?

No, both the regular Sierra Mist and Diet Sierra Mist are caffeine-free.

Can I consume Sierra Mist if I’m sensitive to caffeine?

Yes, Sierra Mist is an excellent caffeine-free alternative for those who are sensitive to caffeine.

What gives Sierra Mist its unique flavor?

Sierra Mist gets its unique flavor from a combination of natural citrus flavors, specifically lemon and lime.

Does sierra mist have less sugar than other soft drinks?

Not necessarily. Sierra Mist uses real sugar and high fructose corn syrup, so its sugar content may be comparable to other soft drinks.

Is Sierra Mist Zero Sugar safe for diabetics?

As with any sugar-free product, it’s generally safer for diabetics than products with sugar. However, it’s still important to consume in moderation and check with a healthcare provider.

Is Sierra Mist a healthier option than other sodas?

While Sierra Mist is free from caffeine and artificial sweeteners, it’s not necessarily ‘healthier.’ It’s important to consume it in moderation because it does have high-calorie content due to the high fructose corn syrup and sugar.

What is the base ingredient in Sierra Mist?

The base ingredient in Sierra Mist is carbonated water. It gives the beverage its signature fizz and forms the foundation of the refreshing Sierra Mist flavor.